Playful Promises Blog

www.playfulpromises.com

The Playful Promises Blog covering all things knicker-related! Bras, girdles, corsets, panties, knickers, gstrings, thongs, longline bra, bra sizes, la bra, suspender belts, garter, dresses, clothing, boutique, stockings, seamed stockings and more!

Filtering by Tag: how to

Makeup Tutorial: Punky Pink

Grab 30% off Makeup with code MAKEUP30 until Friday 14th Aug.

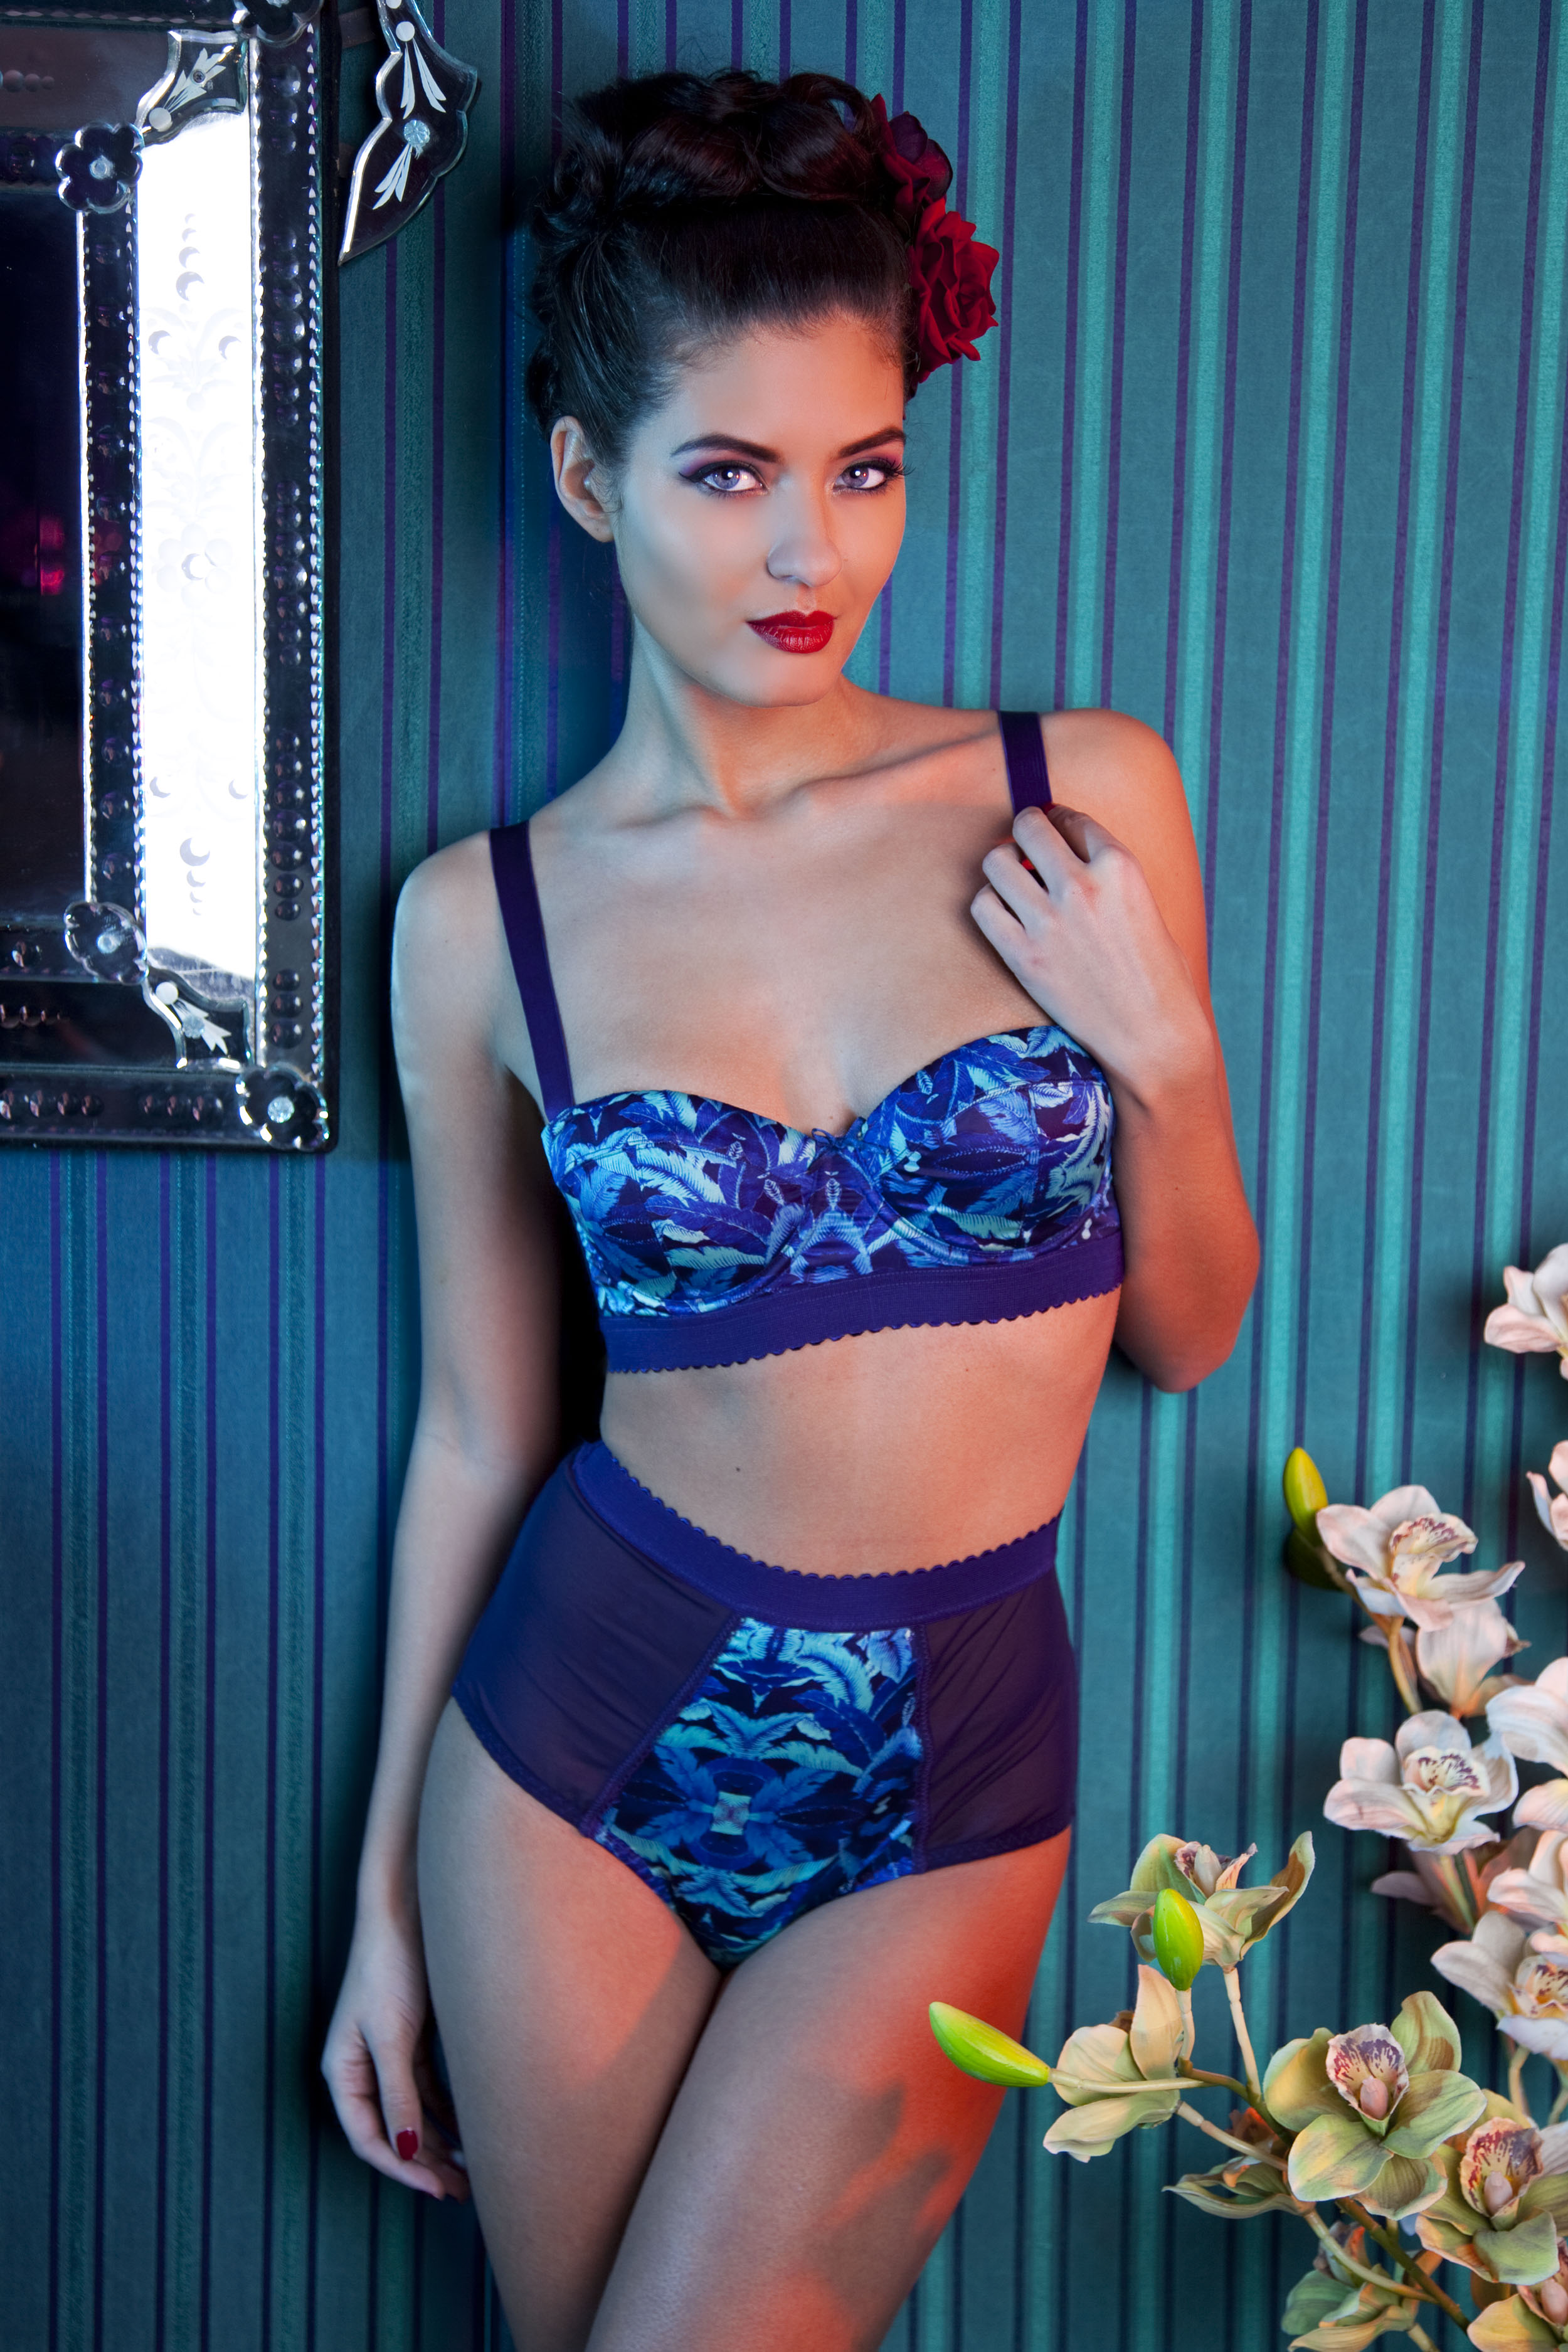
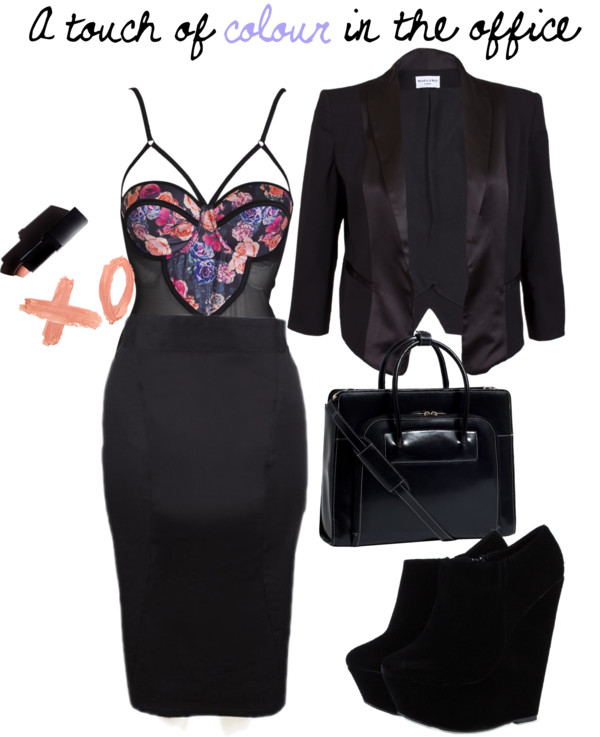
I was inspired by the Peek & Beau Sophie set for this look; pink doesn't necessarily mean girly! This time I've gone for a grungy combination of pink and black, which could work with various different colours swapped in.

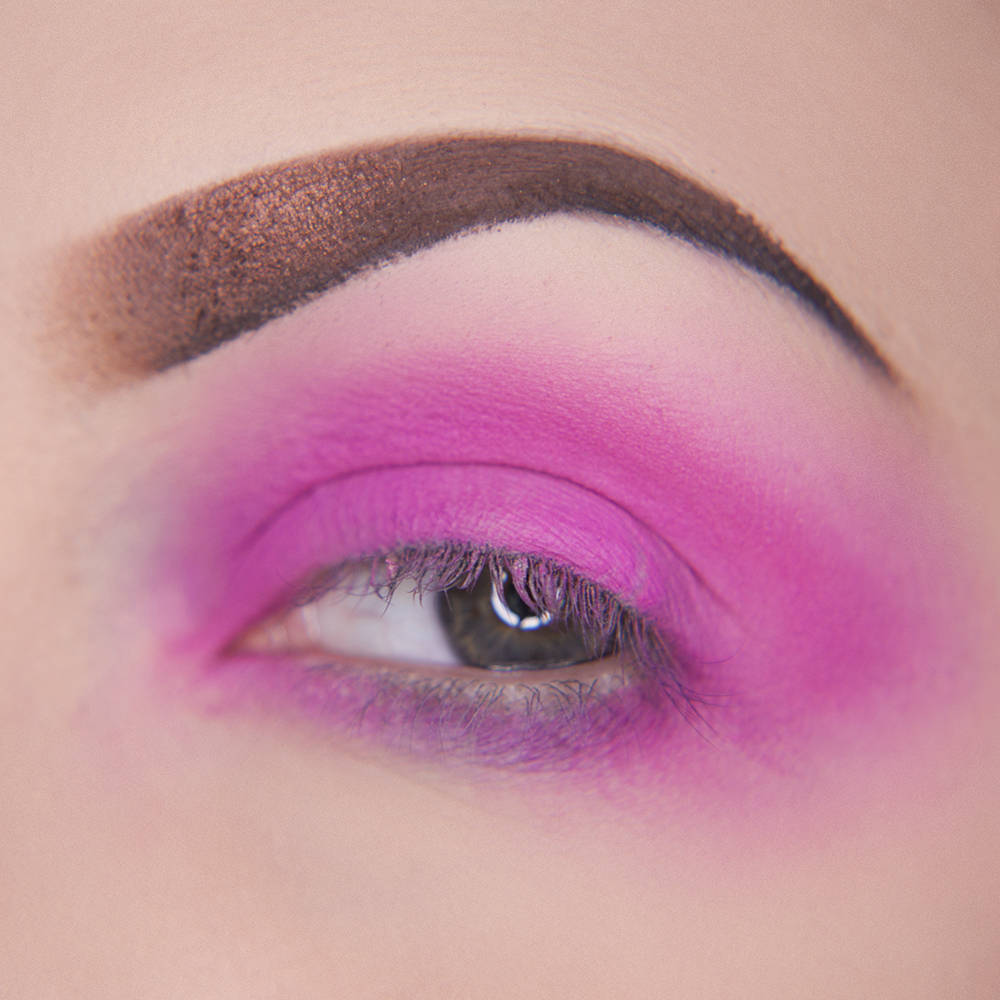
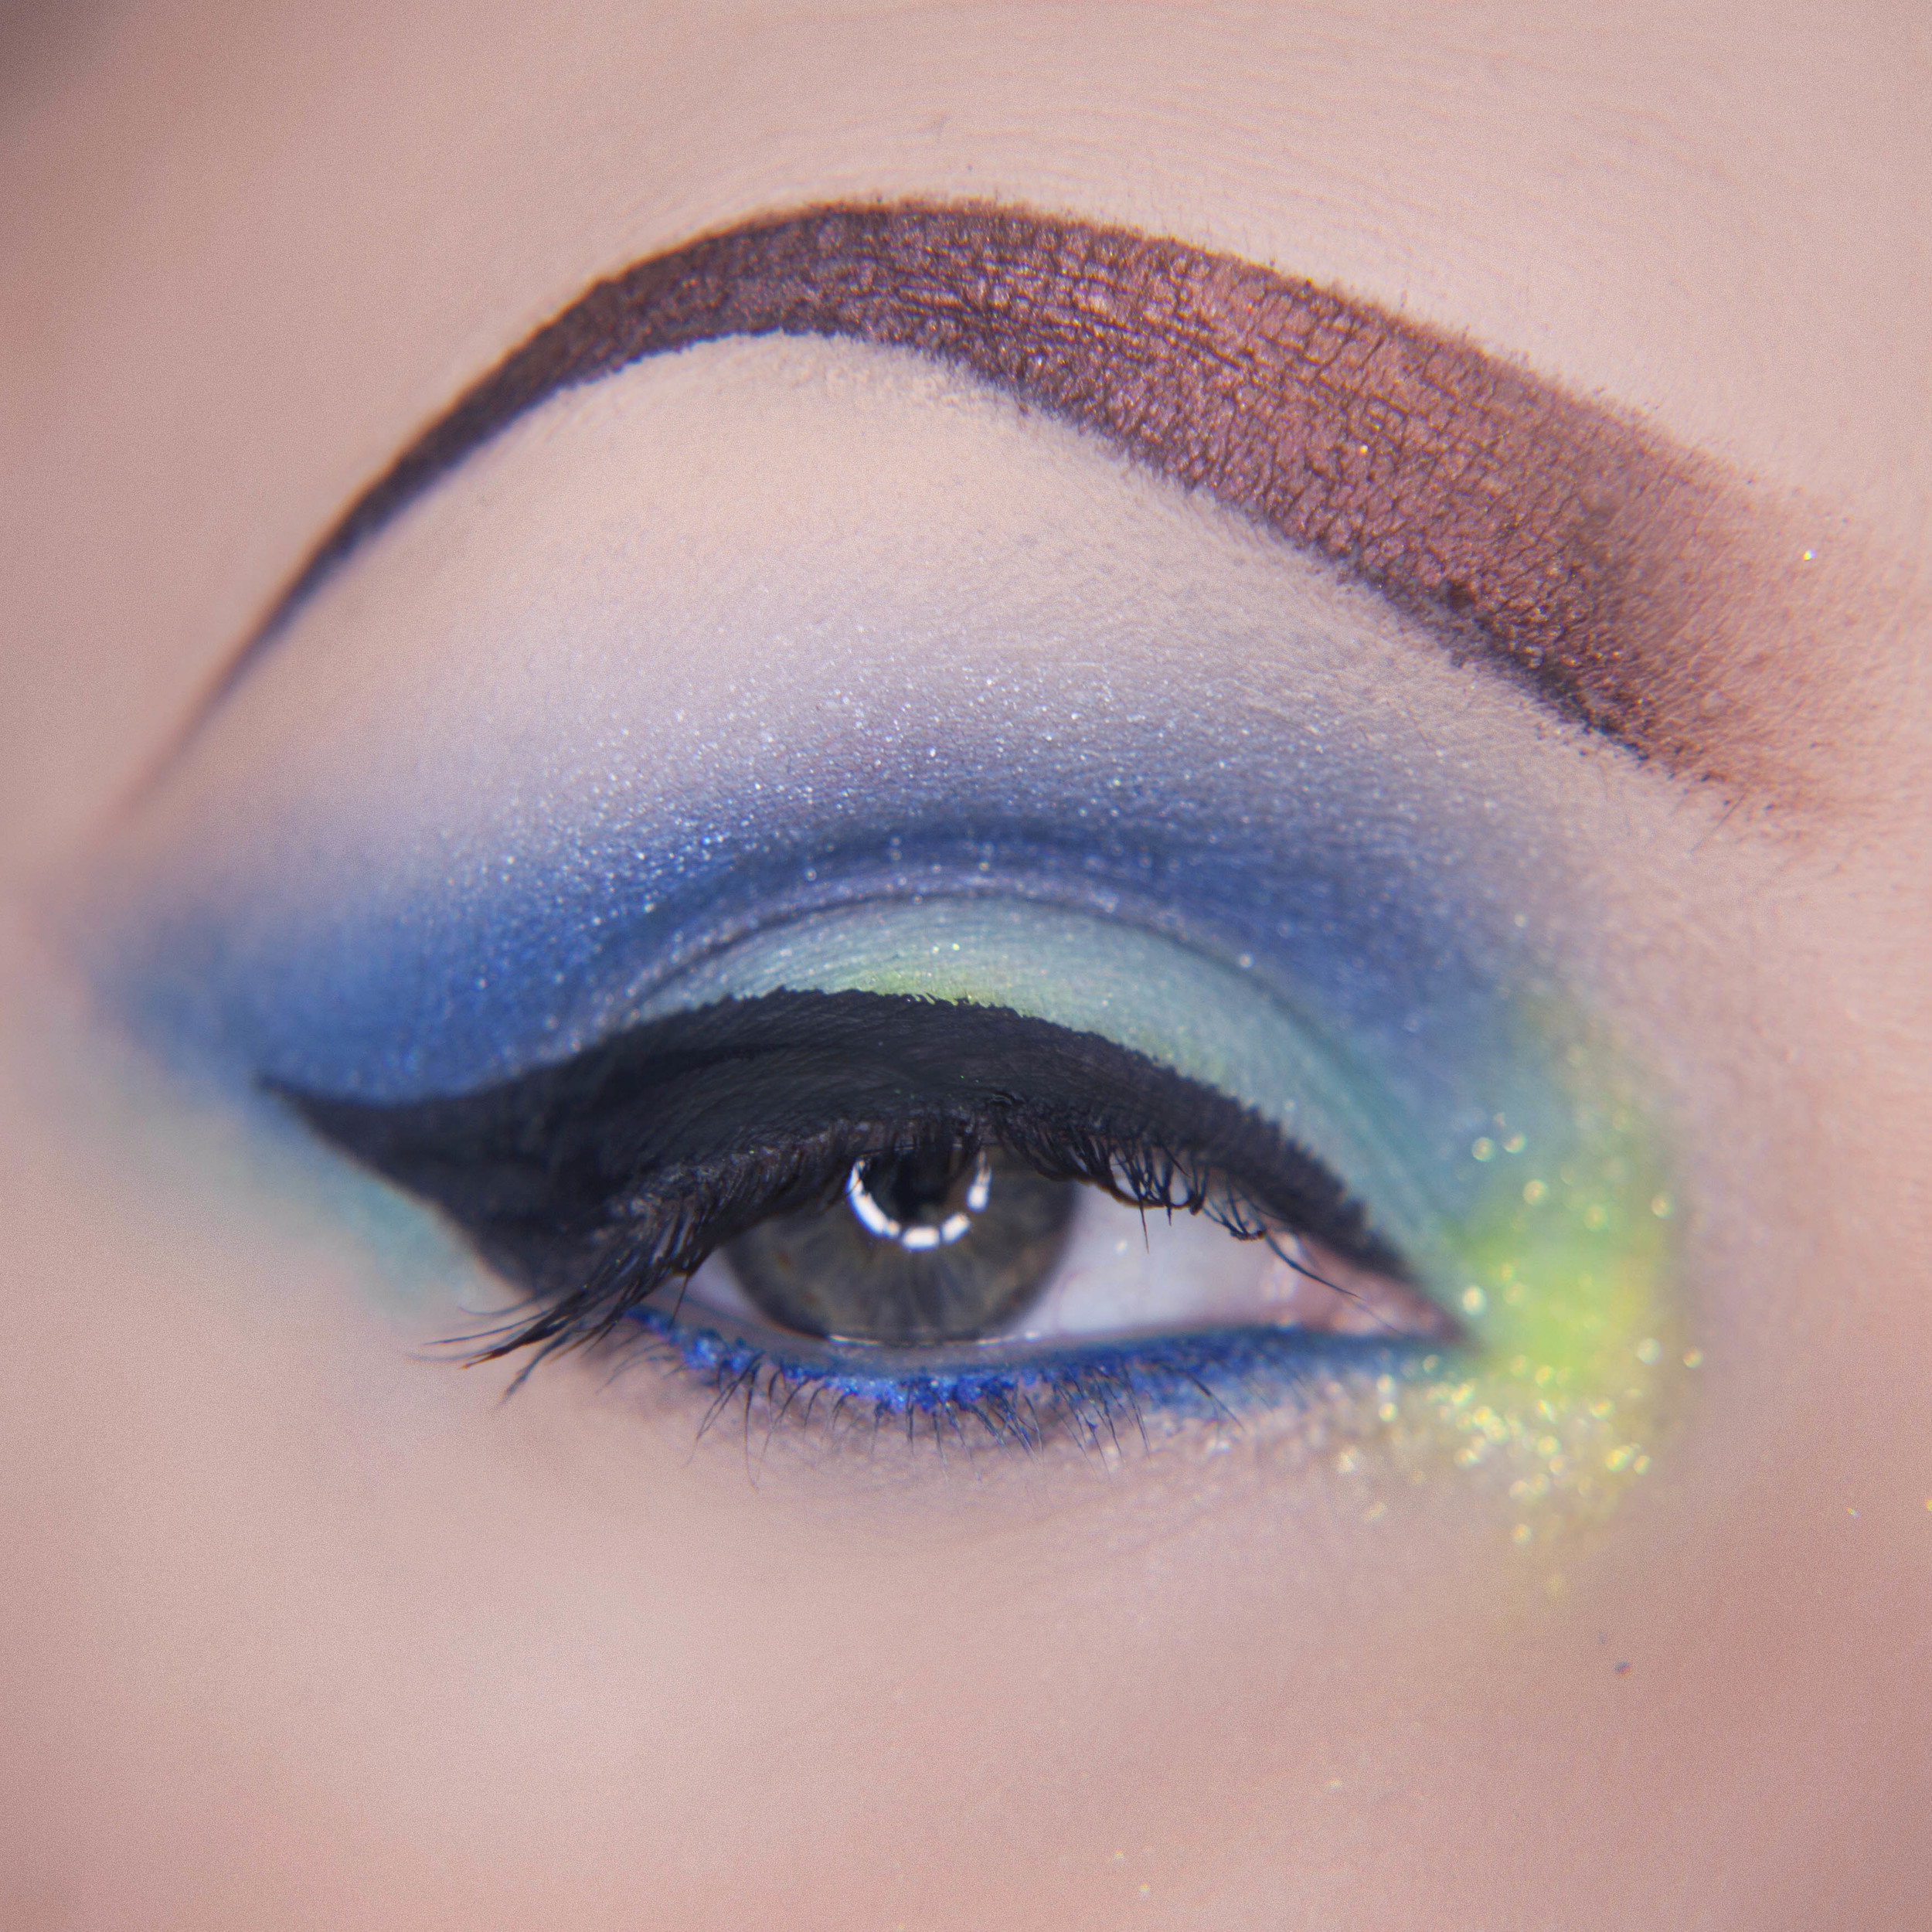
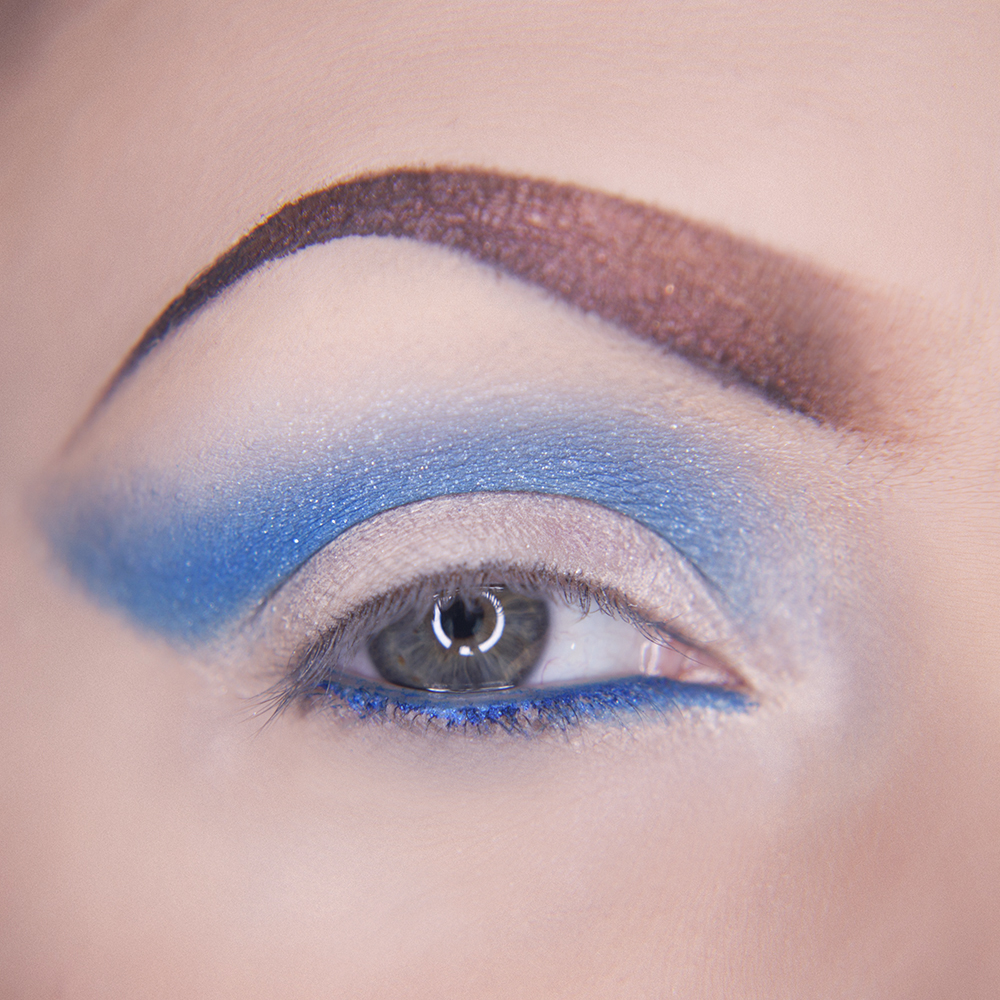
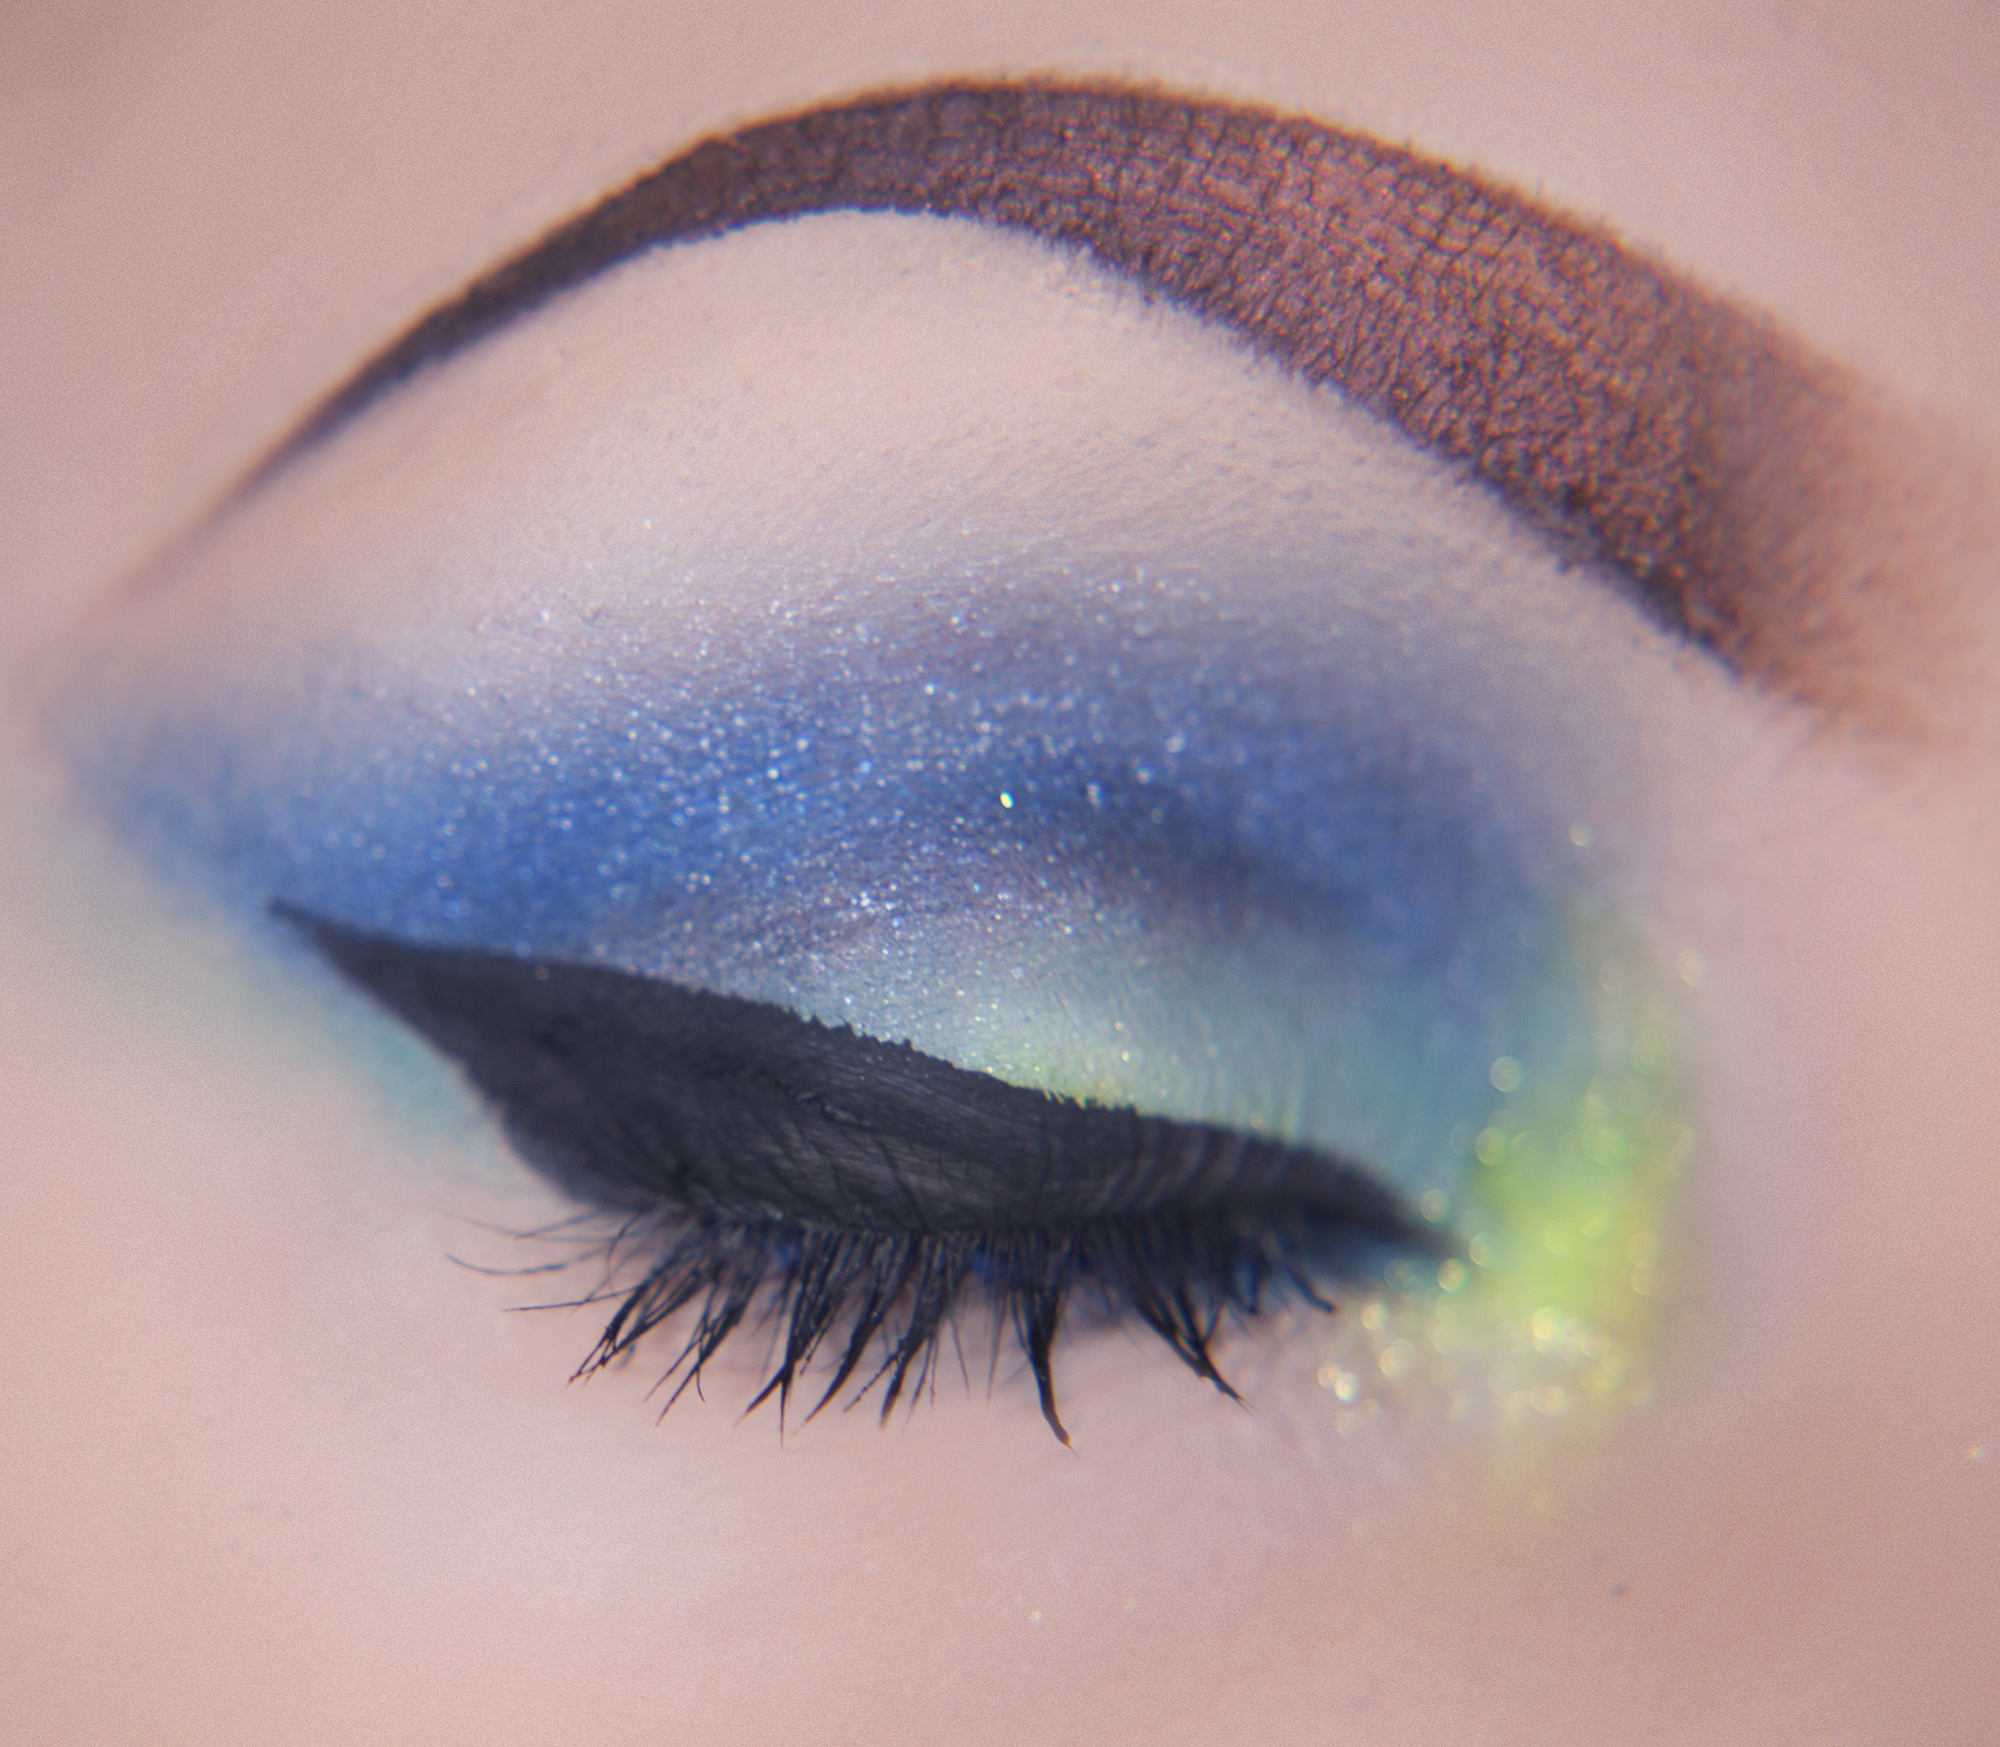
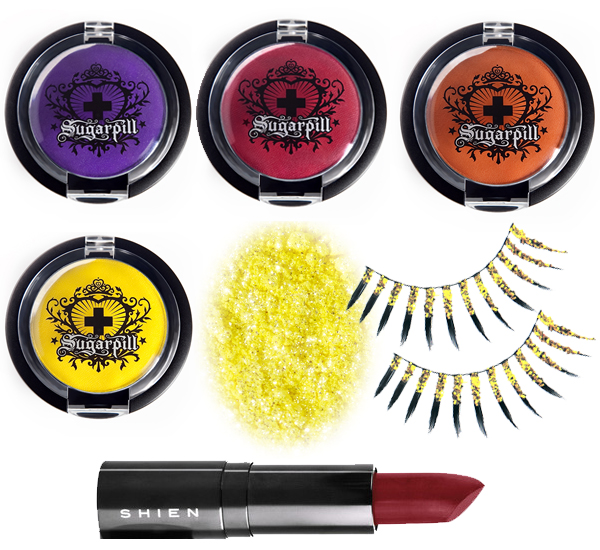
Step 1: Using Sugarpill Dollipop Pressed Eyeshadow and a fairly large eyeshadow brush, apply the colour all over your upper lid in a roughly teardrop shape (wider towards the inner eye, coming to a point on the outer eye). Using a slightly thinner brush, apply the colour underneath the eye, but make sure you aren't bringing it too far down, just along the lash line.

Buff and blend the colour out as you go - as this is a grungy look it doesn't need to be precise but it's more of an organised mess ;)

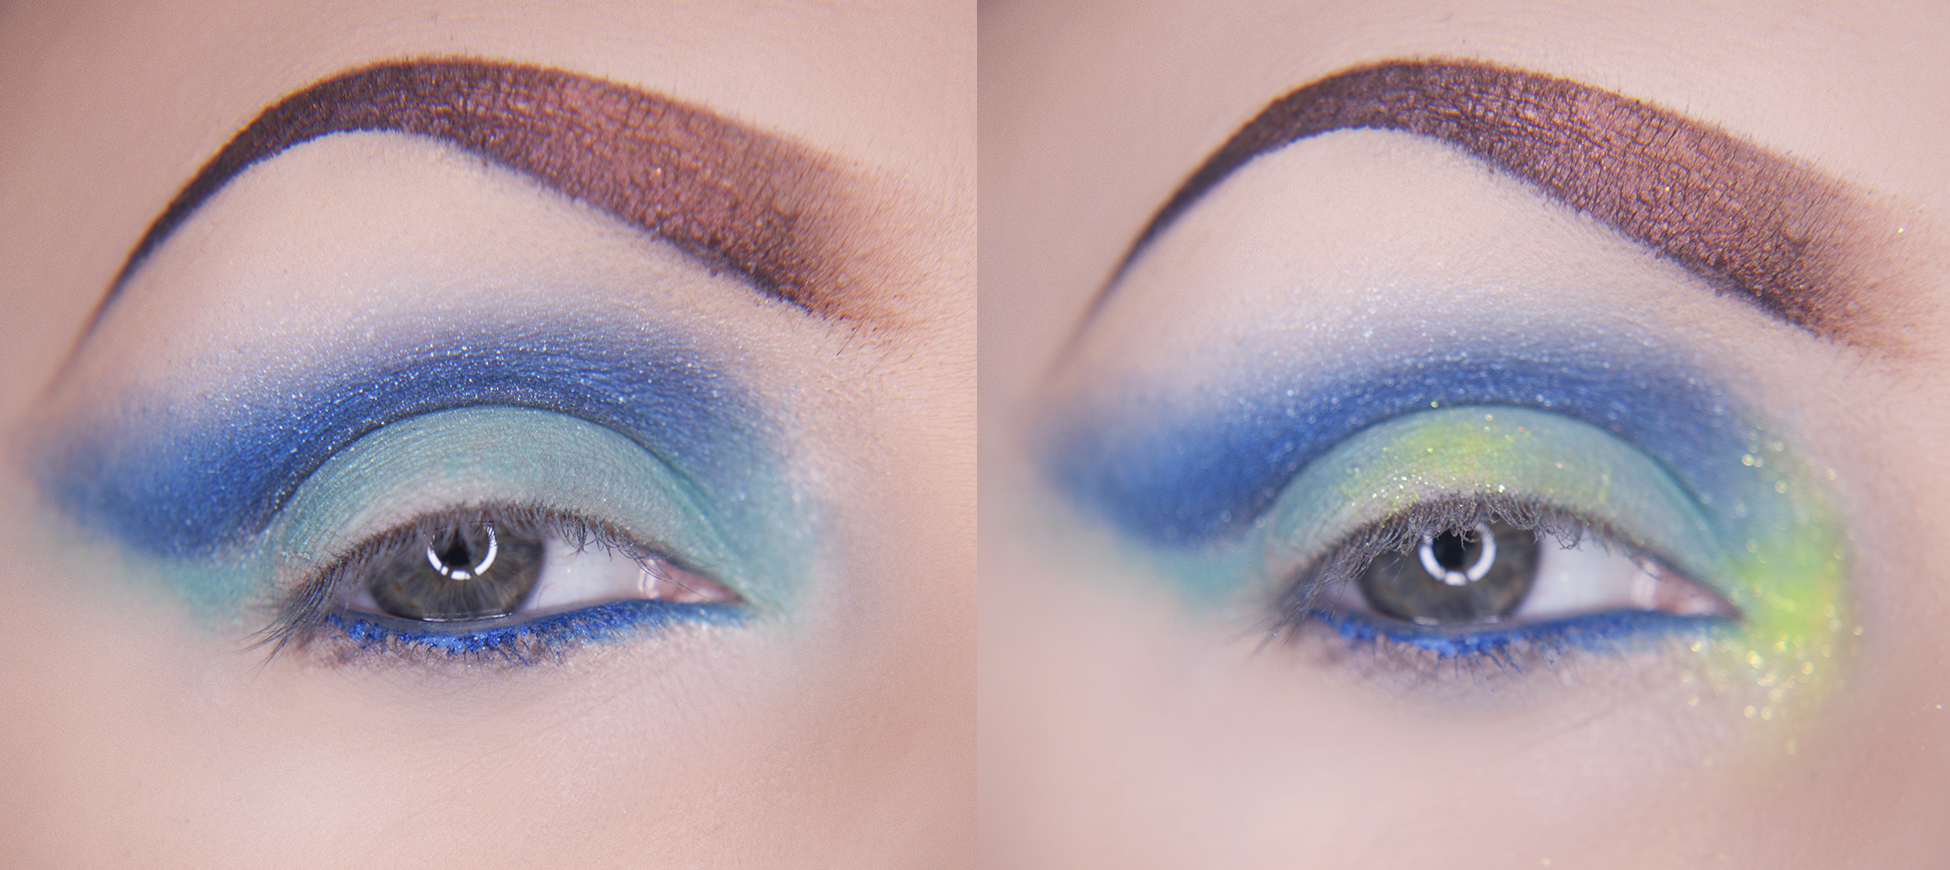
Step 2: Using Sugarpill Bulletproof pressed eyeshadow blend this into the outer corner of your eye, tapering off to a rough flick. Using the thinner brush apply to the lower lash line, blending out into the pink.

Step 3: To ease the blend between the black and the pink, use the Poison Plum eyeshadow between the two colours. 

Step 4: I've also added a touch of white eyeshadow along the brow bone and inner eye.

Step 5: Finish off with a touch of clear sparkle in the inner eye, add mascara on the top and bottom and even some eyelashes

Grab 30% off all makeup from now until the 14th August with code MAKEUP30

Makeup Tutorial: Sea Blue

At Playful Promises we are well-known for our colourful prints, and a new set has just arrived which is a perfect reminder of the rich tones of a warm sea.

I wanted to put together a makeup tutorial inspired by the Flores set, with deep blues and hints of turquoise.

I used all Sugarpill Cosmetics for this look - if you aren't already familiar with Sugarpill, they are an independent brand based in the US. All of the products are cruelty-free and the vast majority are also vegan! Shop for Sugarpill here.

Step 1: Using a brush designed for the crease (normally quite flat to create the more defined crease you are looking for) apply Sugarpill Afterparty Pressed Eyeshadow  along your natural eye crease and flick out at the outer corner. This will be the basic shape of your eye makeup, and as the finish will be cat-eye liner, the bottom of the blue flick will need to be roughly the same curve as your lower lash line.

I've also lined by bottom lid with a blue liner.

Step 2: Use a blending brush in a sweeping motion to gradually drag and blend the colour upwards. To make this blending process a little easier you can use a lighter colour like a white or very light blue to give the ombre effect.

Step 3: Use your crease brush again to add some darker colour into the very base of the crease. I used the Magpie Loose Pigment, which has a slight metallic blue sheen. Use your blending brush again to blend in between Magpie and Afterparty, always blending upwards rather than down.

Step 4: Use a clean brush and add Mochi Pressed Eyeshadow across the lid. Apply and blend into the inner corner and a smaller flick on the outer corner just underneath the blue.

Step 5: Using Hi-Viz Neon Pigment apply just a touch to the inner corner of the eye, which will make the makeup pop. Apply a little to the centre of the lid, blending out into the turquoise.

Step 6: Finally line with black liquid liner into a cat-eye flick - you should be able to follow the basic shape of the blue flick you created earlier, and slant the liner down towards the inner eye. Add mascara or maybe some eyelashes and you're ready to party!

If you use any of the products from our makeup section, make sure you tag #playfulpromises and/or #playfulpromisesmakeup on instagram or twitter so we can take a look!

Grab 30% off all makeup from now until the 14th August with code MAKEUP30


Makeup Tips and Trends: Michelle Court

Following on from my previous makeup post, meet bubbly Essex lass Michelle Court who, similar to Katie, decided she wanted to be a makeup artist as a teen when she discovered the transformation mascara made to her eyes. She began experimenting with electric blue mascara (memories for all those 90s kids!).

Multi-talented, trained in airbrushing, special effects and hairdressing, Michelle has been using her creativity in the industry for over a decade and with her incredible experiences any makeup artist aspires to have her success. 

We asked Michelle a few questions about her career, for all those daunted by their future in the industry as a makeup artist. 

What was it like after years of studying to become a professional makeup artist and then be out inthe big wide word on your first paid job?

I remember I felt very nervous on set with my hands shaking, worrying that your work isn’t going to be liked. After I’d finished the makeup and shown the model in the mirror I was still worrying but once the photographer commented ‘the makeup looks great on camera’ there was a sigh of relief, which helped build my confidence. Each shoot from there onwards my confidence has grown.

What has been your favourite job so far and why?

I like the fast pace of a fashion show, but editorial shoots allow me to be more creative and bold. Each shoot is different and I enjoy them all, but the most memorable one I will never forget is Ibiza. I get to travel with work but on this particular occasion I got to stay on an elite 5* yacht, shoot in beautiful million pound villas and magical secluded beaches.

Have you ever been on a shoot and it was an absolute nightmare?

The most awkward moment in my entire career was working on celebrity model Janice Dickinson; she was rude and erratic, bad mouthing all the beautiful models and to top it off said ‘don’t you know who I am?’! I smiled and nodded politely. Once I’d finished working on her face I said ‘ok, you can look in the mirror’ and as she turned to look; our heads collided and I ended up head-butting her!

Finally, for this season will the electric blue mascara be making a reappearance in your makeup bag?

I love experimenting; especially using bold and exciting colours which work well on camera for high fashion shots; but I also like neutral shades. Bright Sugarpill loose powders can create a great look with a subtle lip from Shien cosmetics. My motto is: you’re only as good as your last work, so experiment and enjoy!

Check out Michelle's work for inspiration at www.court-on-camera.com

And don't forget that you can shop for Sugarpill, Shien Cosmetics and Cirque Colors on our website!

Grab 30% off all makeup from now until the 14th August with code MAKEUP30

Makeup Tutorial: Autumn Glitz

You may have noticed that we've started stocking makeup from Sugarpill and Shien Cosmetics!

I was very, very excited about this as one of my obsessions (other than lingerie, of course) is makeup, and lots of it. I love being creative with colour and style, and Sugarpill's colourful pigments are perfect for this. 

I'll be putting together fun and creative tutorials to show you what you can do with these products!

In this tutorial I'll be creating a vibrant Autumn-inspired look with some of my favourite Sugarpill pigments; Poison Plum, Love +, Flamepoint, Buttercupcake and Hi-Viz Neon. I'll finish with the Glitzy lashes and Shien Cosmetics Cobra Lily Lipstick.

I love my makeup bold and bright, but you can lay it on as thick as you like, and be as creative as you like. The great thing about these pigments is that with less product on your brushes, you can create a more subtle look!

Step 1: Using a fairly thin brush, or one that's flat, apply Love + along the crease of your eyelid and curve outwards in a flick. Don't worry about being messy on the lid at this point, as you'll be blending upwards. Take time on creating the curve of the flick; if you have trouble keeping the line, you can cut a curve out of some paper or card and use this as a template.

Step 2: Apply Poison Plum just along the crease of the eyelid, creating a smaller flick inside the red. Using a small blending brush, soften the edges where purple meets red. To do this, load a small amount of Poison Plum onto the blending brush and gently buff where you want to blend.

Step 3: Using a clean brush, tidy up the lid below the Poison Plum. Using a slightly larger brush, apply Flamepoint above the red, higher up towards the inner eye, sloping down to meet the flick of the outer eye.

Step 4: You may need to start building colour up in layers in order to blend everything together. I added more Love + in-between the orange and purple to blend the two together. Leave the area above the orange while you do this, as you don't want any purple/red getting up there.

Step 5: Apply the Buttercupcake above the orange, along the bottom of your eyebrow to define shape. To make my eyes pop I also add the yellow to the inner eye and the eyelid, which also defines the crease. Add a touch of Hi-Viz pigment to the inner eye, and sweep along the yellow just below the eyebrow.

Step 6: Using liquid or gel eyeliner (I swear by Collection's Liquid Liner), create a cat-flick, starting low on the inner eye and gradually sloping upwards to the outer eye. With the eyeshadow flick already there you can mimic this shape. Add your favourite mascara.

Step 7: For a really glam look, add the Glitzy False Eyelashes to your upper lash line. I find eyelashes always seem a bit big for my eyes, so I cut mine down slightly.

Step 8: Use red lip liner and Shien Cosmetics Cobra Lily Lipstick to add the finishing touch!

I'd love to see how you get on! #playfulpromisesmakeup or @playfulpromises on instagram with your looks!


Style Guide: Bodysuits

We've all been there. We've bought something we really really love, and find that our mind just draws a blank when deciding what to wear with it!

Bodysuits (because they are just so flexible) can be troublesome in this way, especially when you want to do the underwear as outerwear trend! Don't fret, we've put together just a few ways you could wear our Anastasia Bodysuit. 


Look 1: Dancing the Night Away


Whether you are partying with your friends or on a hot date, the bodysuit adds a bit of an edge to your outfit! This body lends itself well to a rock-girl outfit, with black panels and cage strap detail casting a tougher edge against the dark floral pattern.

Team with a chunky statement necklace, wedge heels (in black, purple or pink), a leather-look skirt and an embellished jacket for a playfully dark look.


Look 2: Like a Boss


Kick ass at work with this twist on the traditional skirt-suit!

For an injection of colour, wear the bodysuit with a black pencil skirt, Whistle & Wolf Tuxedo Jacket, black wedges and a matching briefcase. 


And sometimes you just need a bit of time to yourself! 

Settle down with your favourite book or tv show, slip on some warm socks and put the kettle on. Team the bodysuit with a robe (we love Kriss Soonik's loungewear) and get under that blanket!