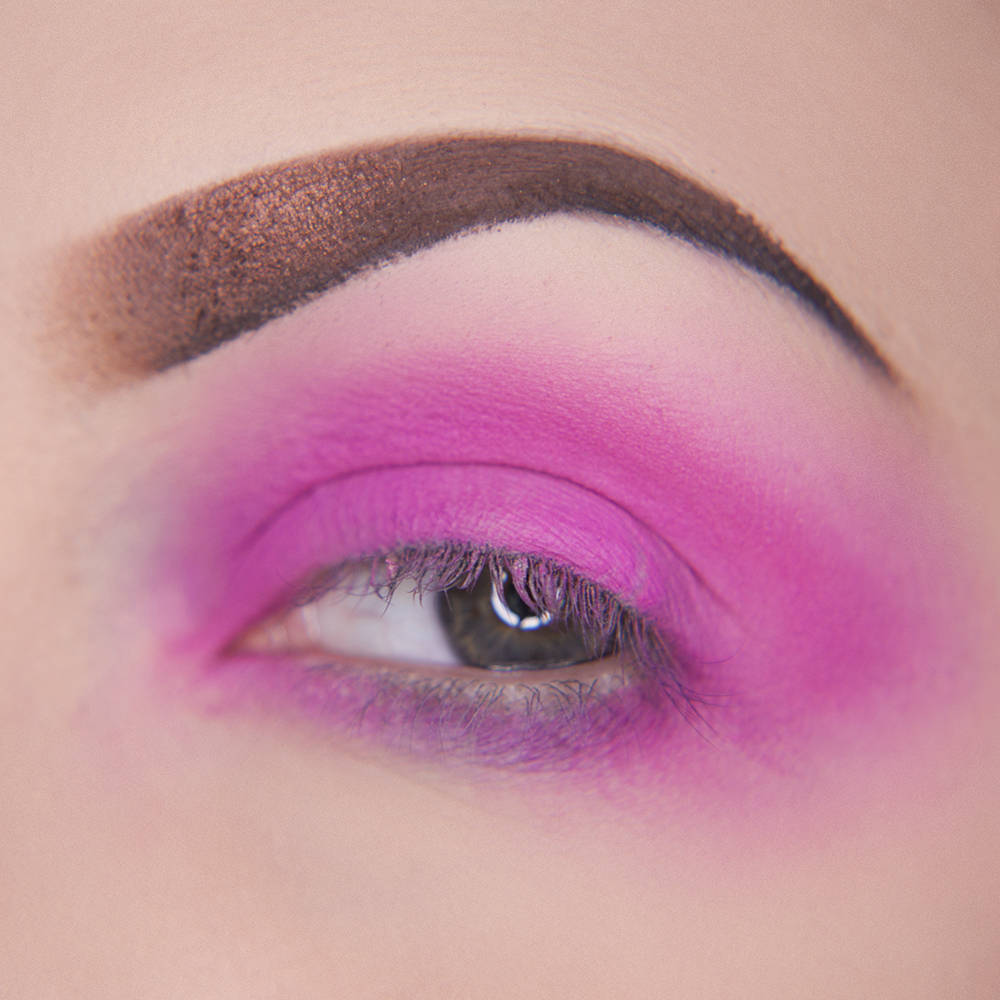
Step 1: Using Sugarpill Dollipop Pressed Eyeshadow and a fairly large eyeshadow brush, apply the colour all over your upper lid in a roughly teardrop shape (wider towards the inner eye, coming to a point on the outer eye). Using a slightly thinner brush, apply the colour underneath the eye, but make sure you aren't bringing it too far down, just along the lash line.
Buff and blend the colour out as you go - as this is a grungy look it doesn't need to be precise but it's more of an organised mess ;)
Step 2: Using Sugarpill Bulletproof pressed eyeshadow blend this into the outer corner of your eye, tapering off to a rough flick. Using the thinner brush apply to the lower lash line, blending out into the pink.
Step 3: To ease the blend between the black and the pink, use the Poison Plum eyeshadow between the two colours.
Step 4: I've also added a touch of white eyeshadow along the brow bone and inner eye.
Step 5: Finish off with a touch of clear sparkle in the inner eye, add mascara on the top and bottom and even some eyelashes!
Grab 30% off all makeup from now until the 14th August with code MAKEUP30
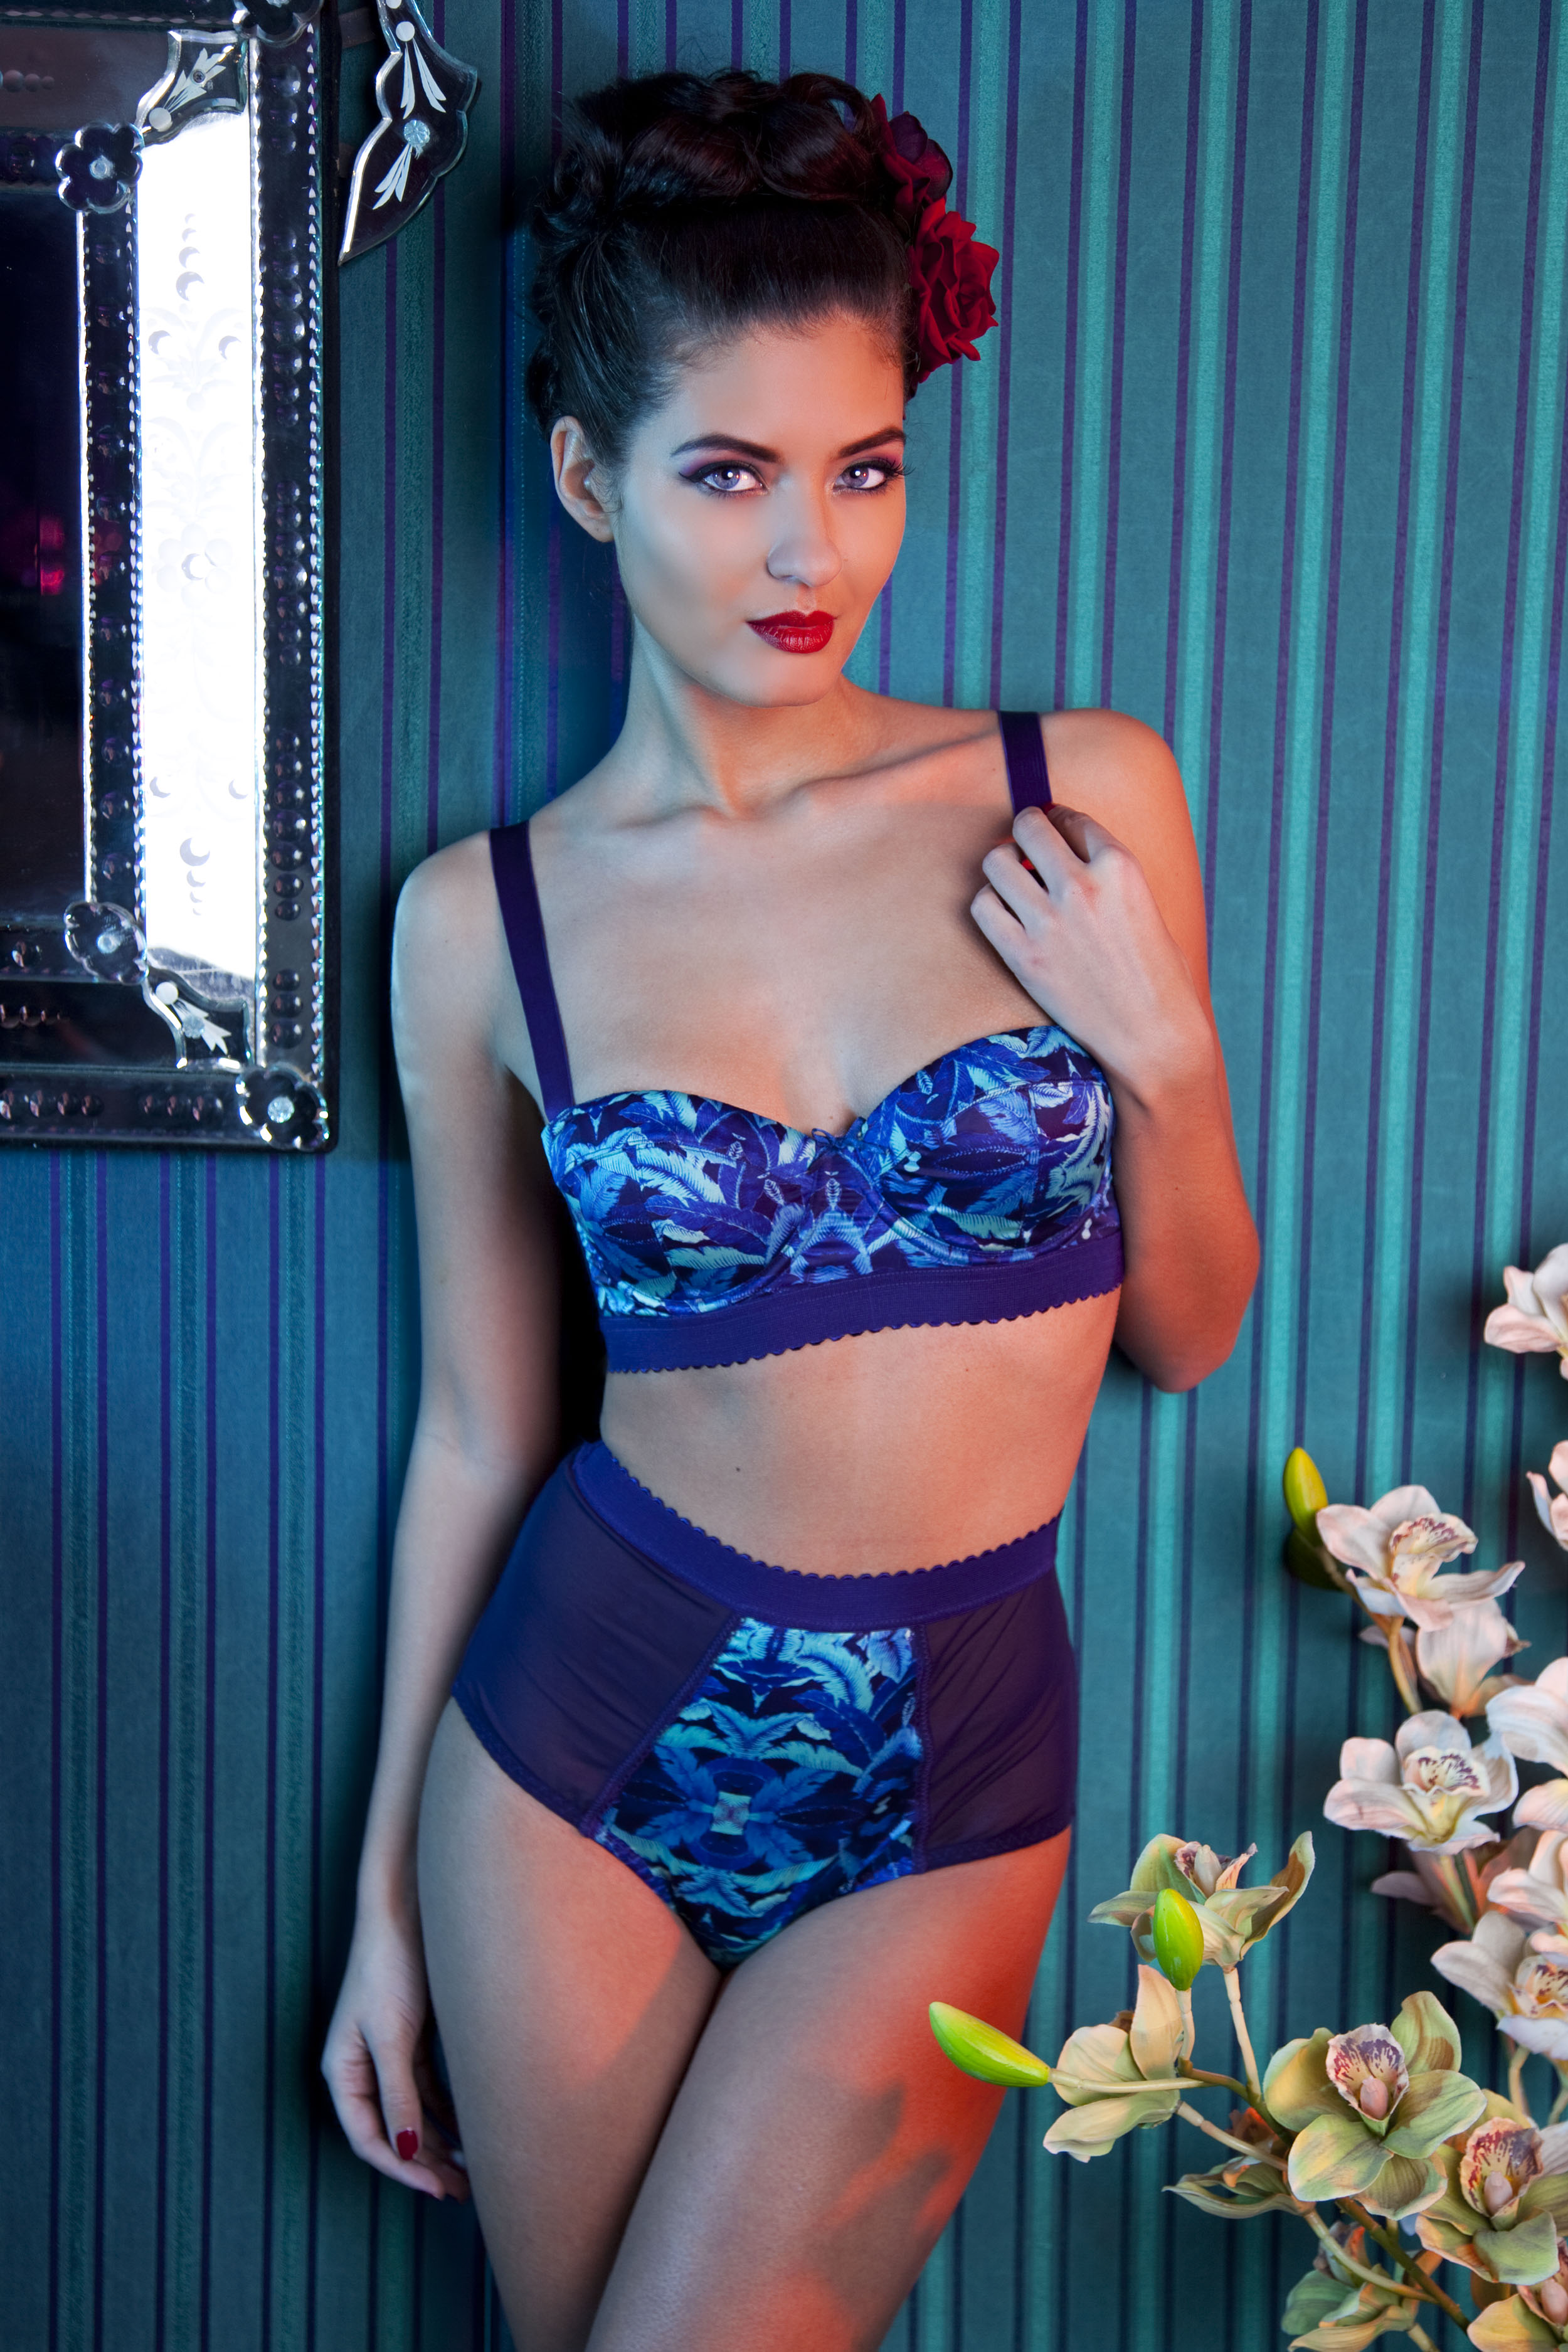
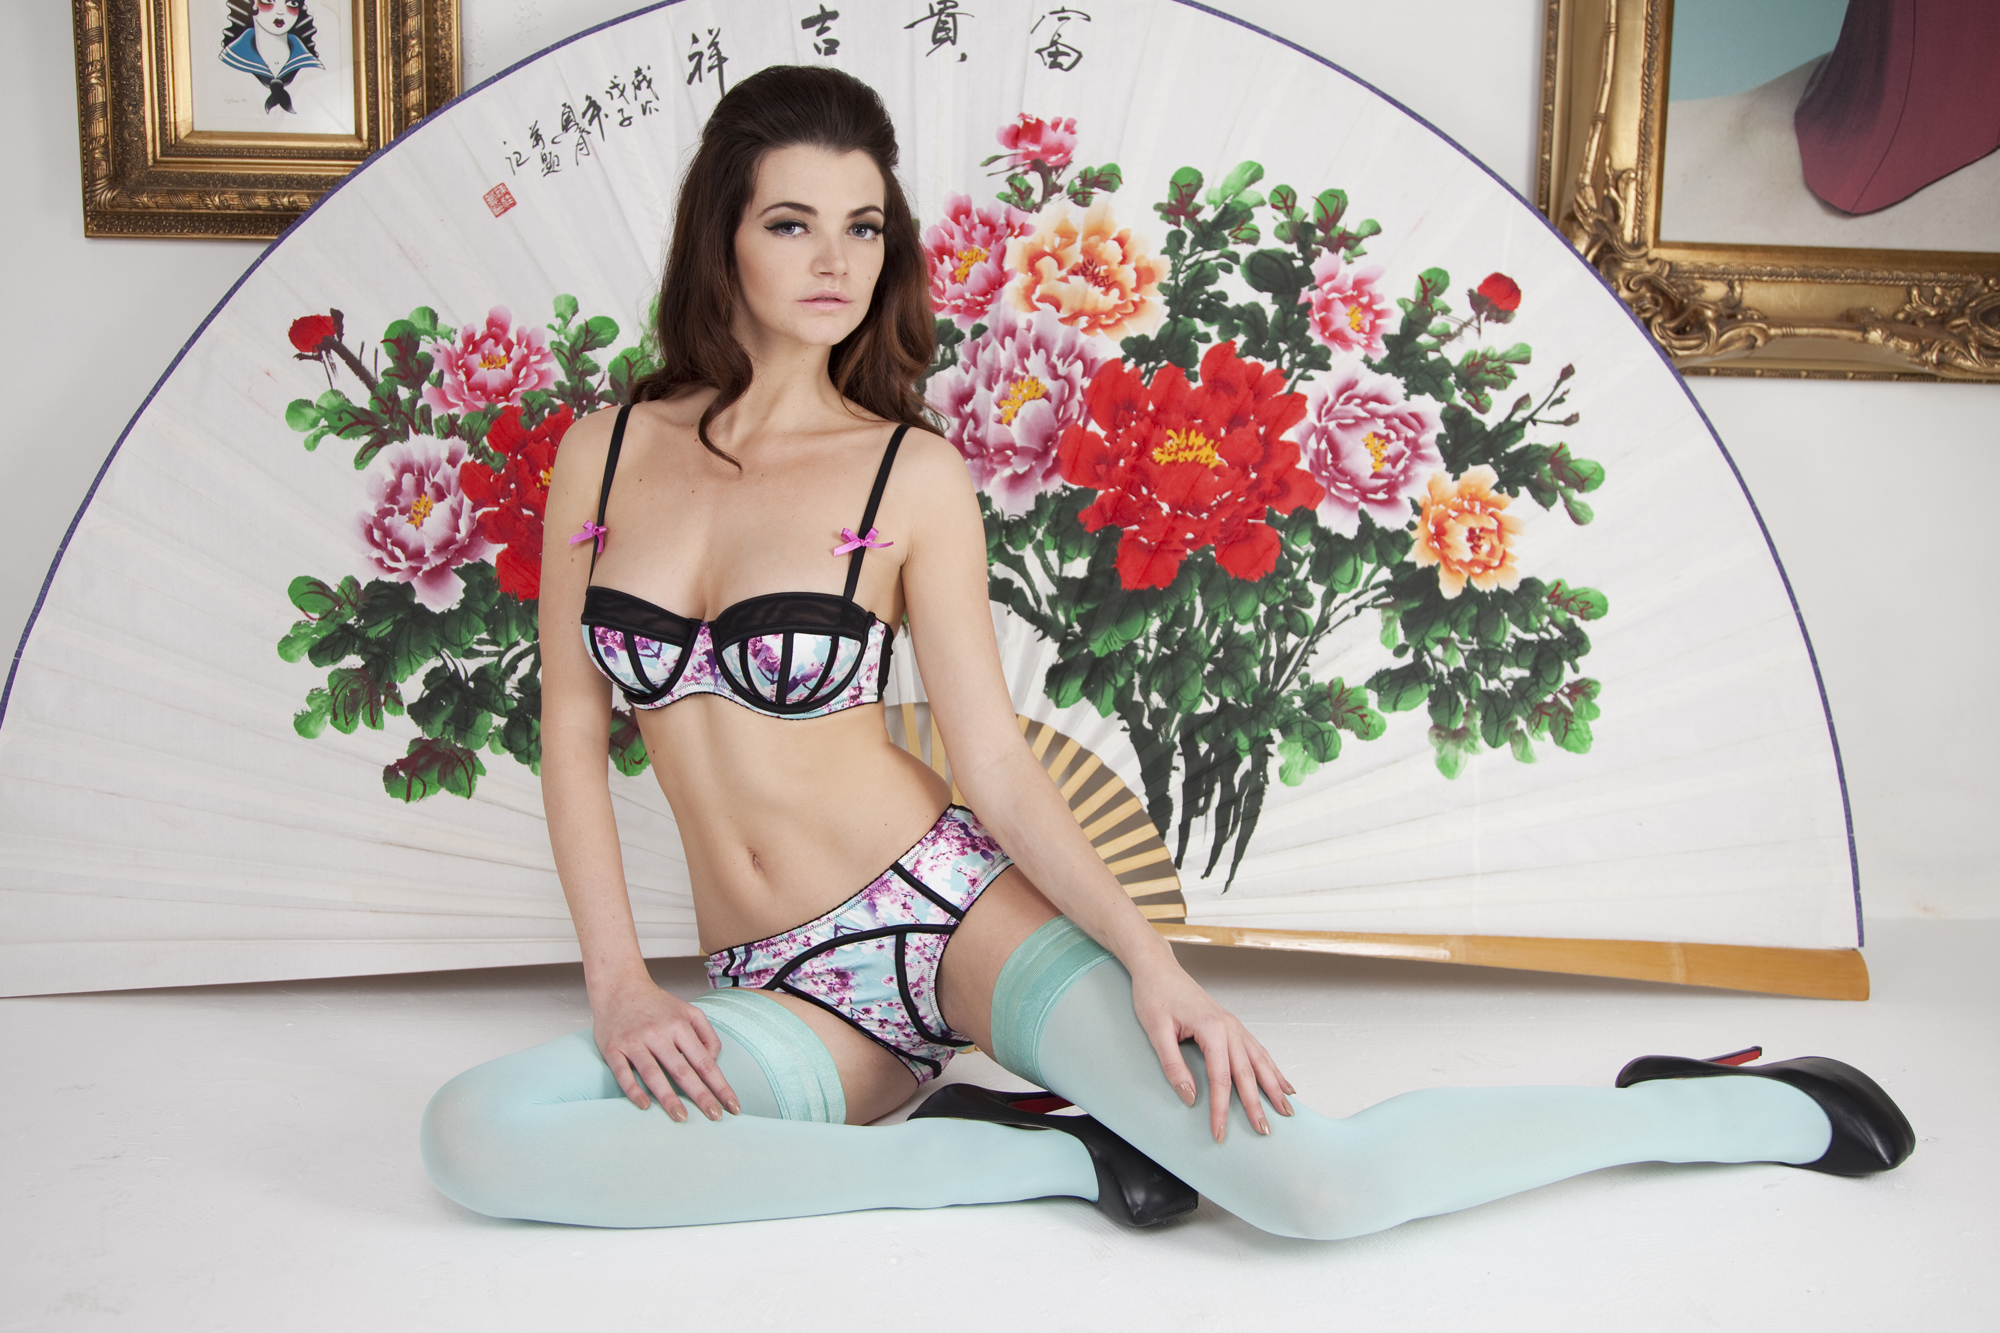
At Playful Promises we are well-known for our colourful prints, and a new set has just arrived which is a perfect reminder of the rich tones of a warm sea.
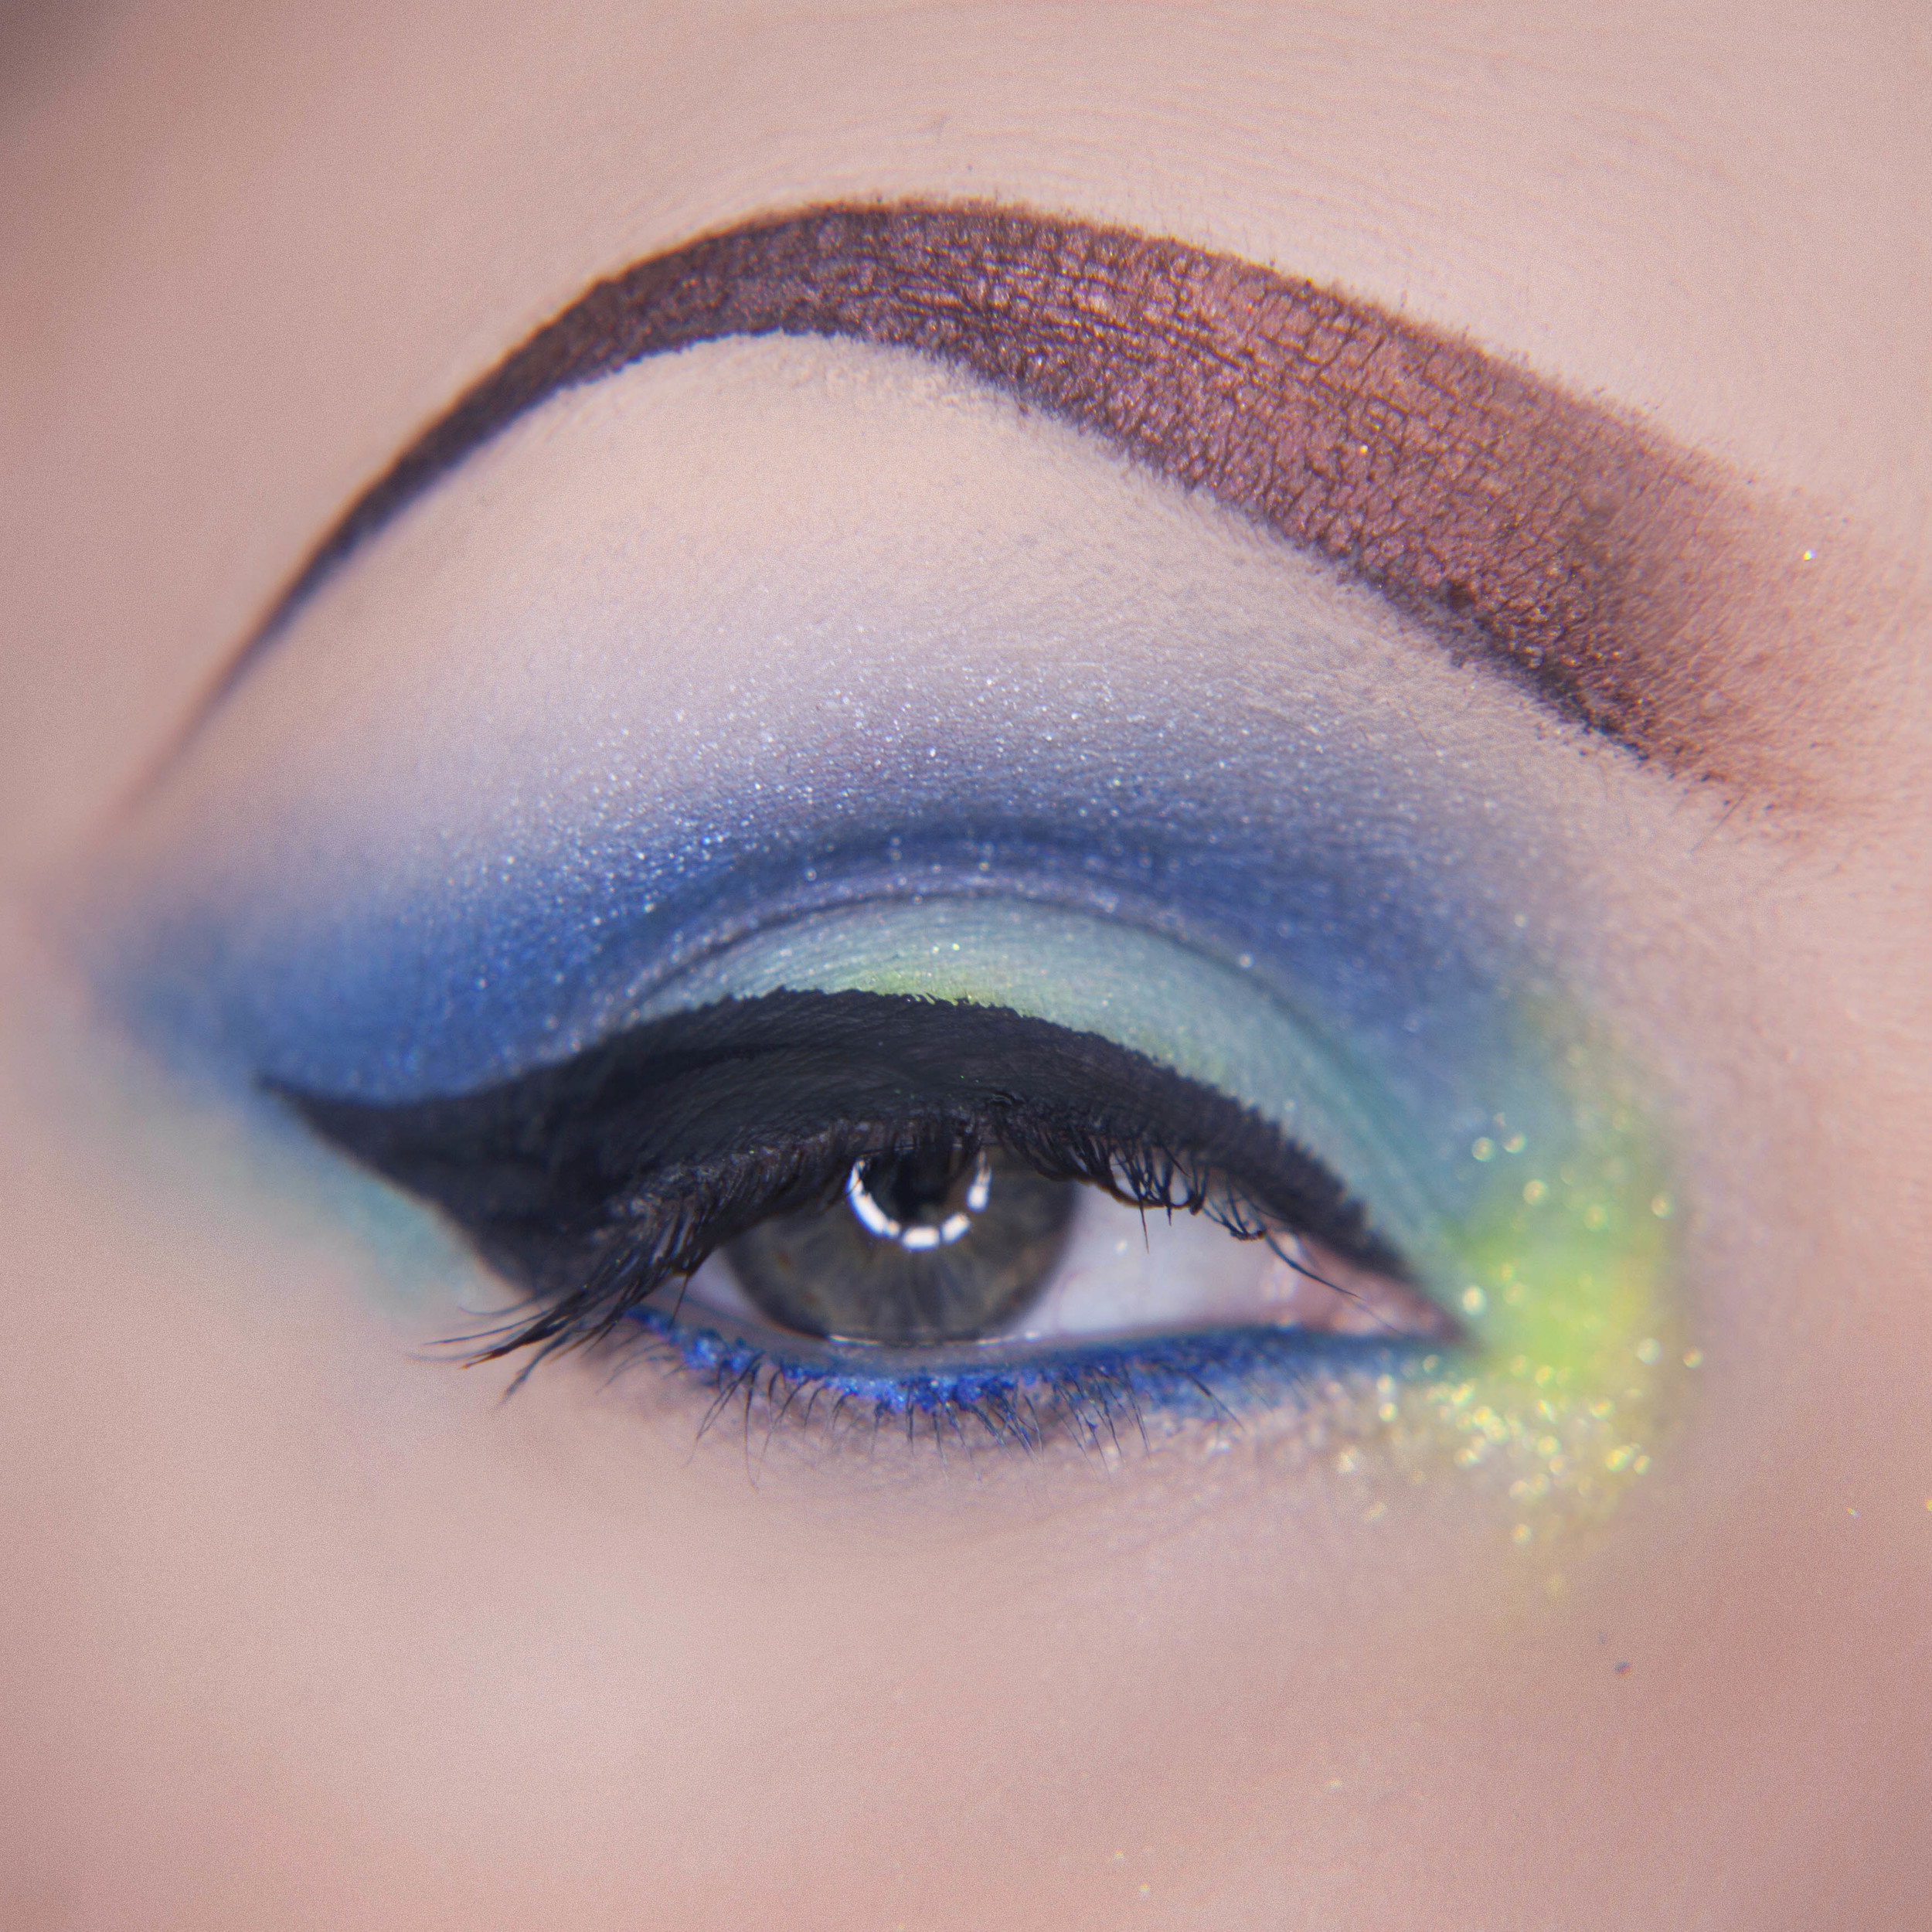
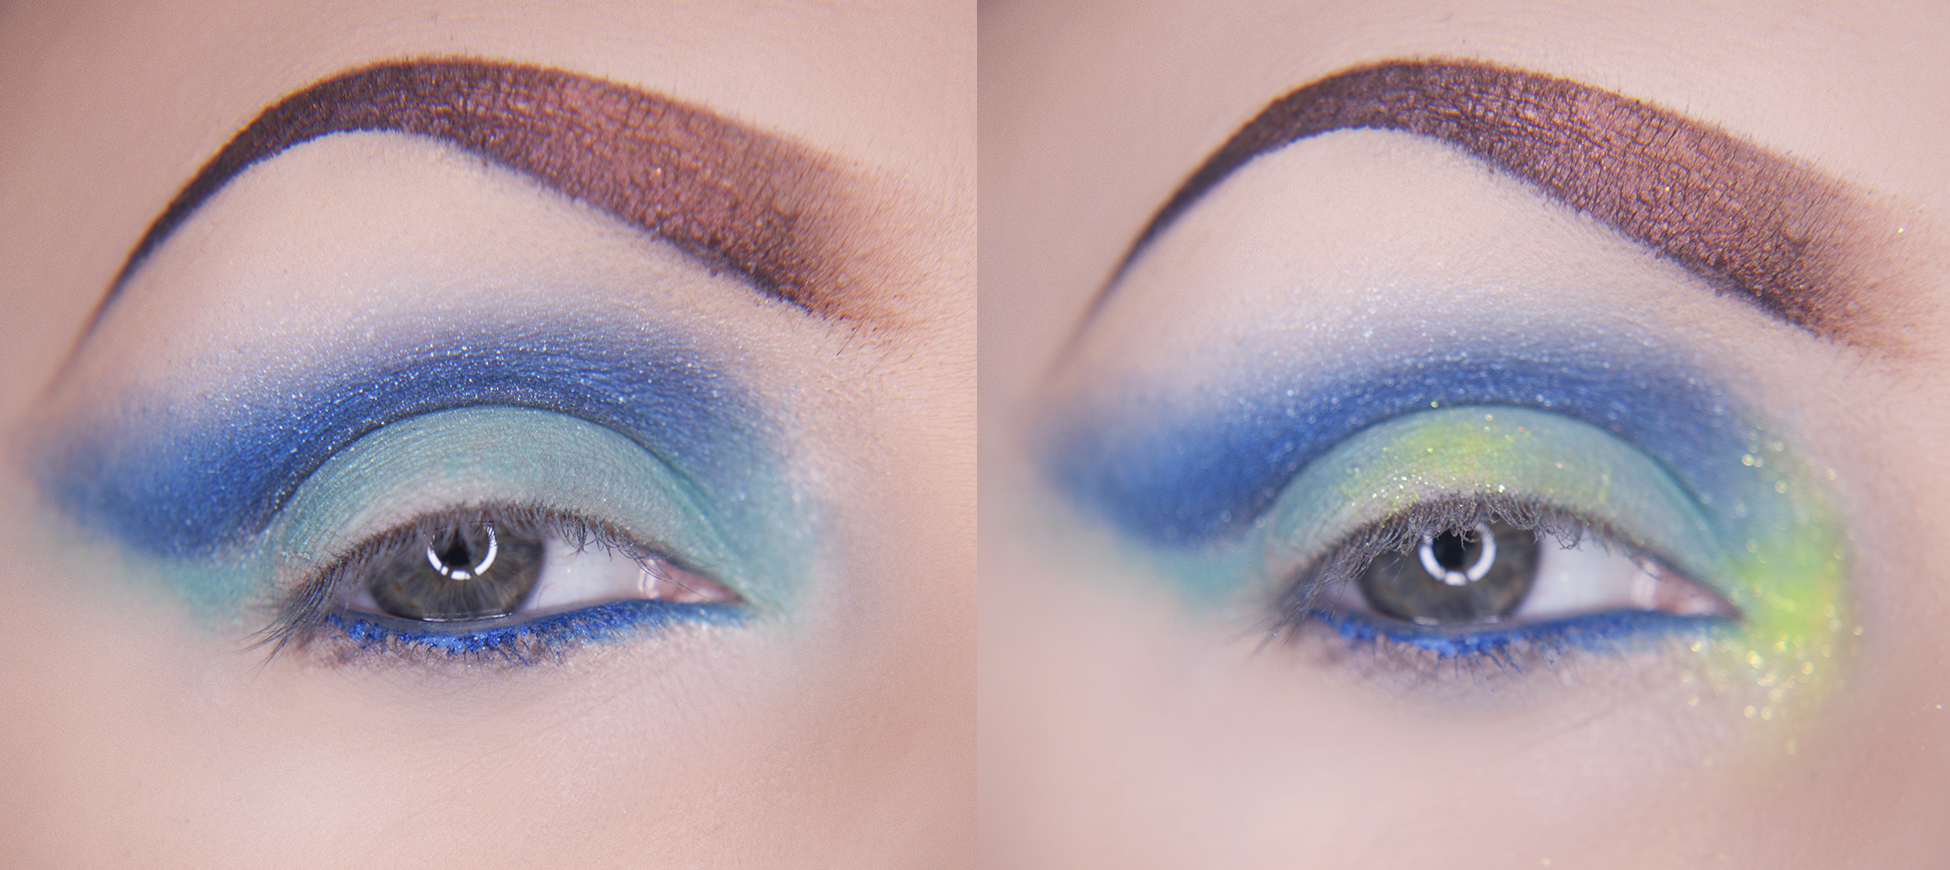
I wanted to put together a makeup tutorial inspired by the Flores set, with deep blues and hints of turquoise.
I used all Sugarpill Cosmetics for this look - if you aren't already familiar with Sugarpill, they are an independent brand based in the US. All of the products are cruelty-free and the vast majority are also vegan! Shop for Sugarpill here.
Step 1: Using a brush designed for the crease (normally quite flat to create the more defined crease you are looking for) apply Sugarpill Afterparty Pressed Eyeshadow along your natural eye crease and flick out at the outer corner. This will be the basic shape of your eye makeup, and as the finish will be cat-eye liner, the bottom of the blue flick will need to be roughly the same curve as your lower lash line.
I've also lined by bottom lid with a blue liner.
Step 2: Use a blending brush in a sweeping motion to gradually drag and blend the colour upwards. To make this blending process a little easier you can use a lighter colour like a white or very light blue to give the ombre effect.
Step 3: Use your crease brush again to add some darker colour into the very base of the crease. I used the Magpie Loose Pigment, which has a slight metallic blue sheen. Use your blending brush again to blend in between Magpie and Afterparty, always blending upwards rather than down.
Step 4: Use a clean brush and add Mochi Pressed Eyeshadow across the lid. Apply and blend into the inner corner and a smaller flick on the outer corner just underneath the blue.
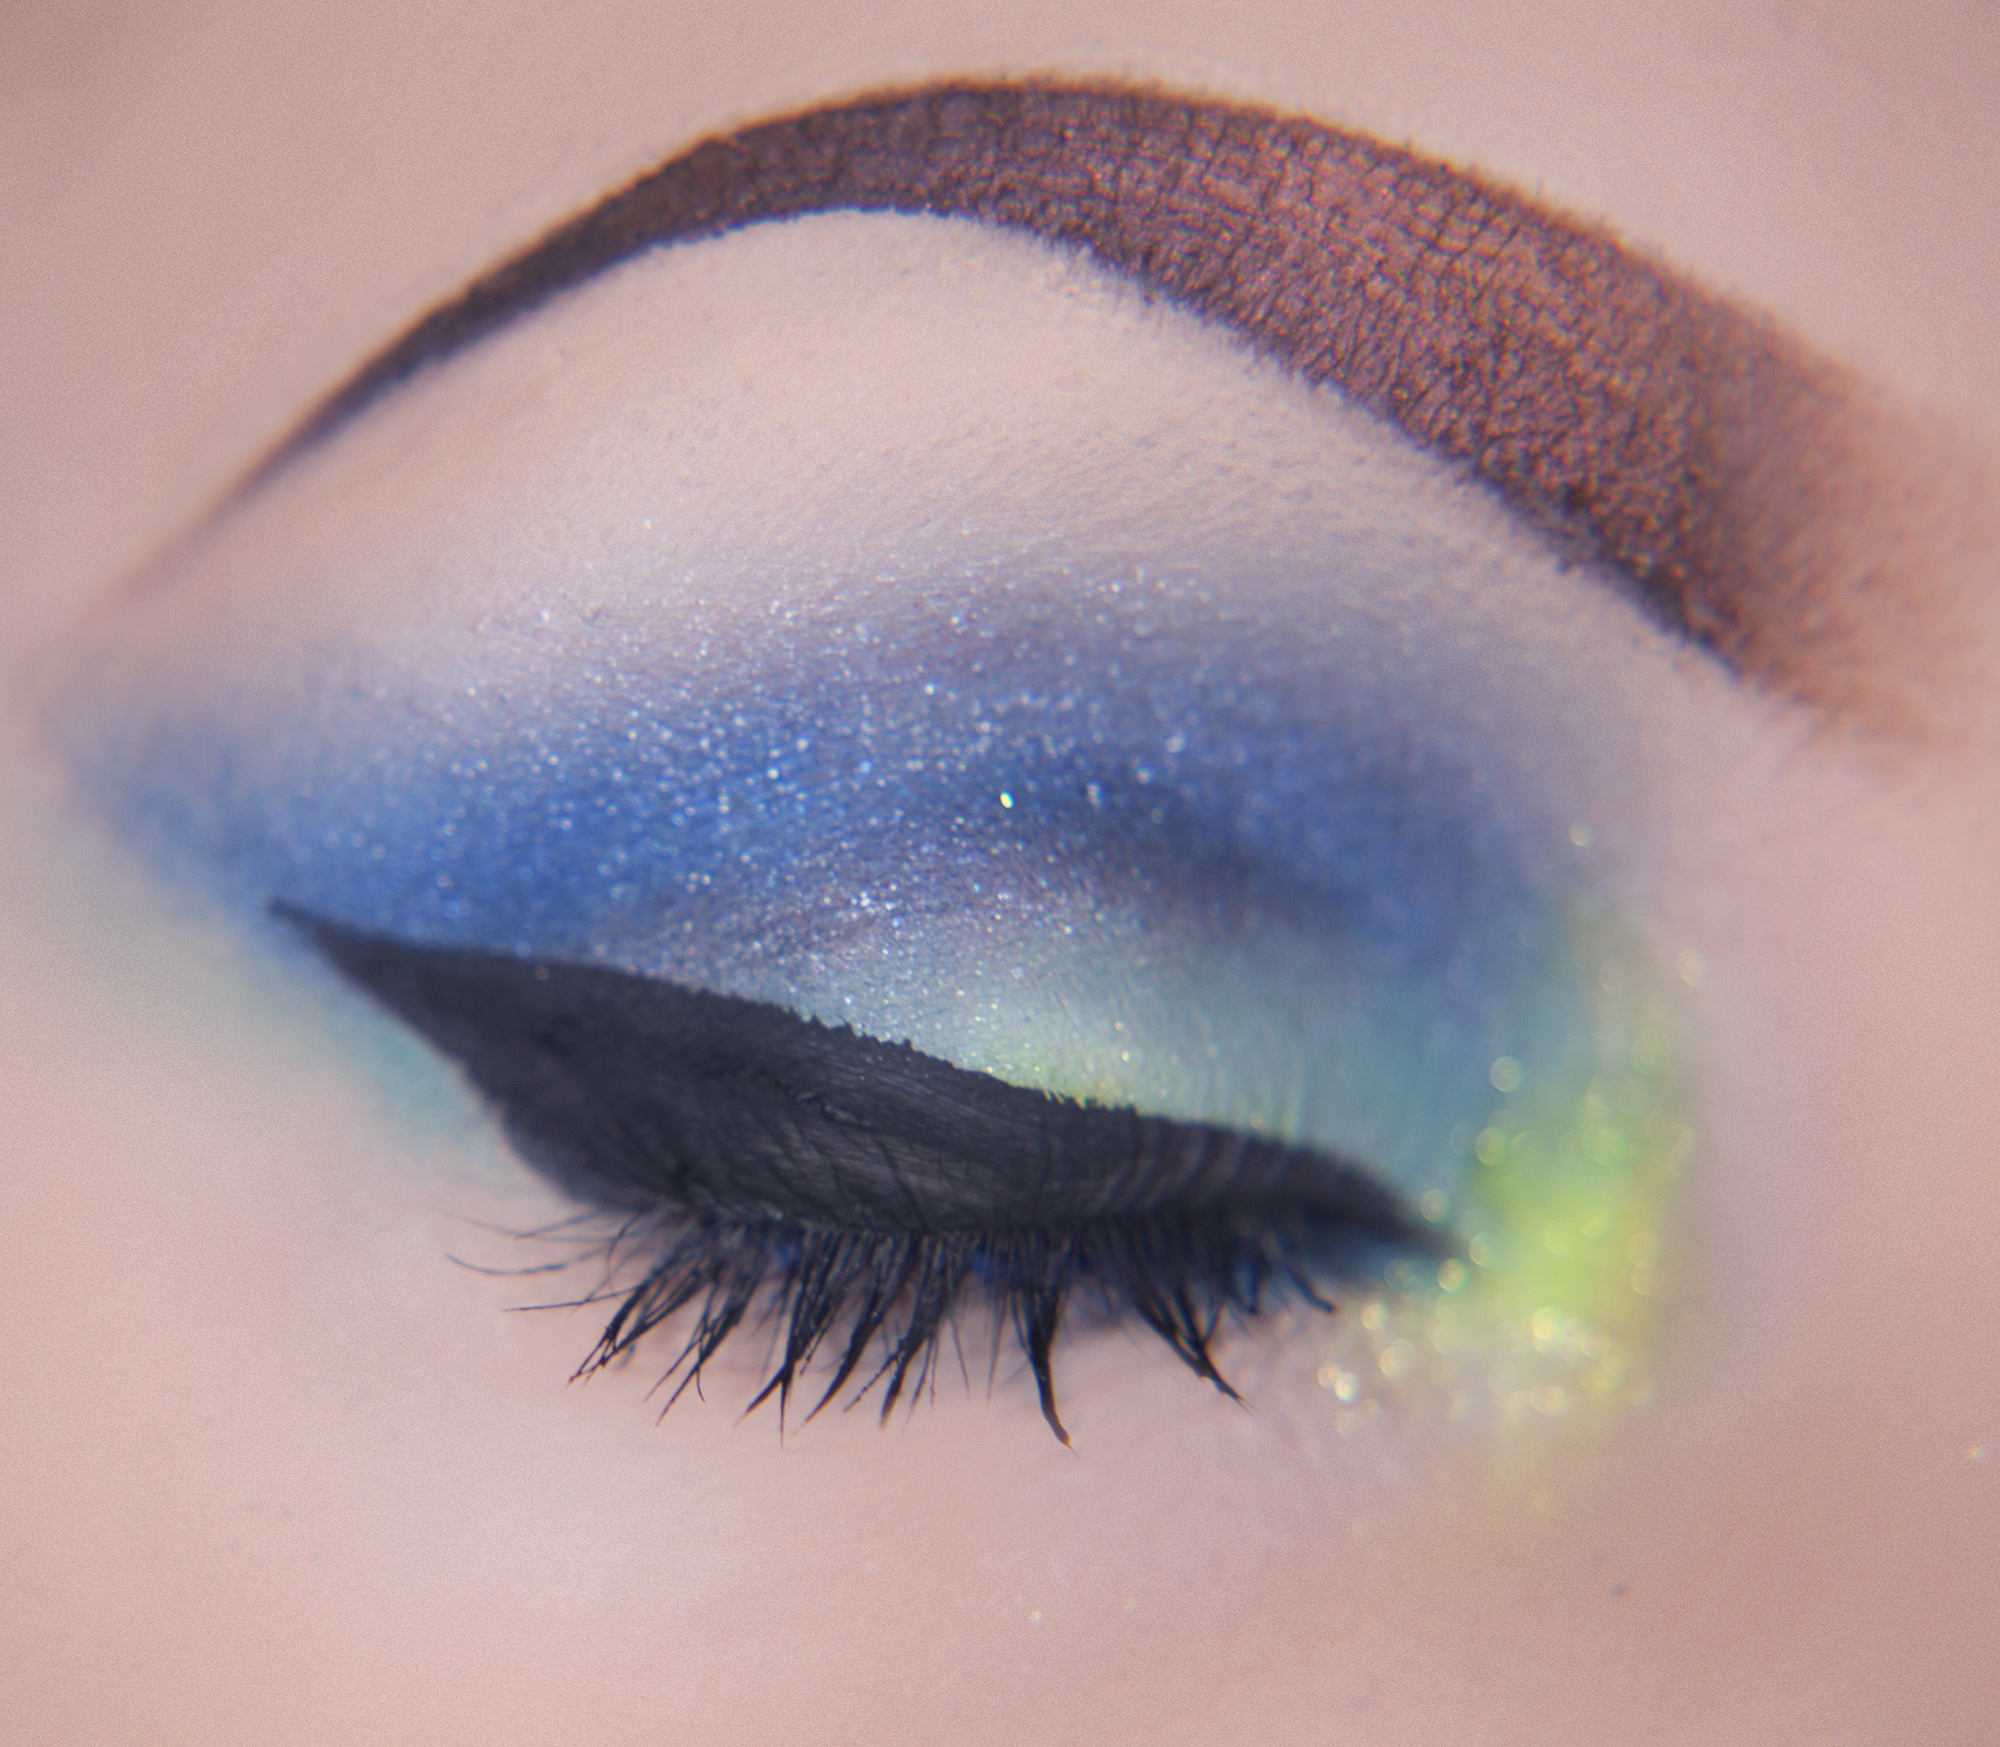
Step 5: Using Hi-Viz Neon Pigment apply just a touch to the inner corner of the eye, which will make the makeup pop. Apply a little to the centre of the lid, blending out into the turquoise.
Step 6: Finally line with black liquid liner into a cat-eye flick - you should be able to follow the basic shape of the blue flick you created earlier, and slant the liner down towards the inner eye. Add mascara or maybe some eyelashes and you're ready to party!
If you use any of the products from our makeup section, make sure you tag #playfulpromises and/or #playfulpromisesmakeup on instagram or twitter so we can take a look!
Grab 30% off all makeup from now until the 14th August with code MAKEUP30
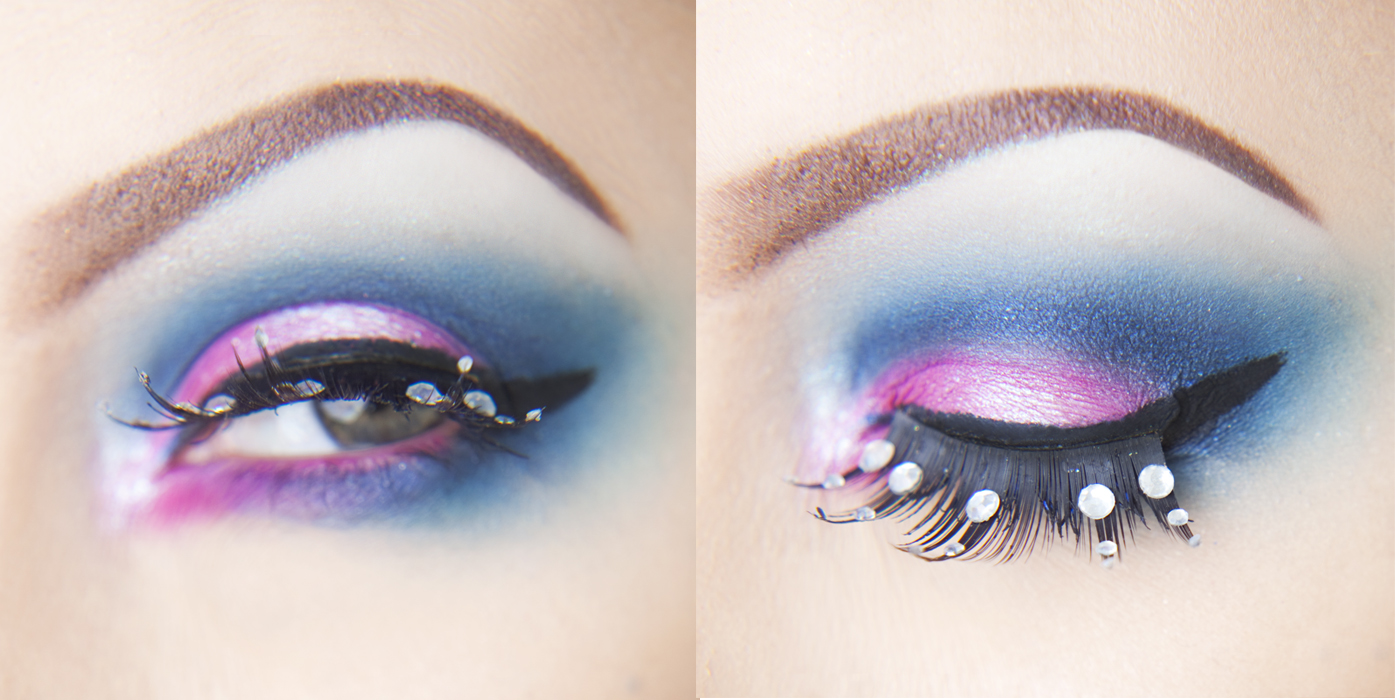
For this tutorial I was inspired by the colours of our Mia set! The gorgeous pink and blue cherry blossom print was created exclusively by our in-house team, so you won't see it anywhere else.
For this tutorial I'll be using some colourful pressed eyeshadow and loose eyeshadow from Sugarpill, along with their Idol false eyelashes.
I love my makeup bold and bright, but you can lay it on as thick as you like, and be as creative as you like. The great thing about these pigments is that with less product on your brushes, you can create a more subtle look!
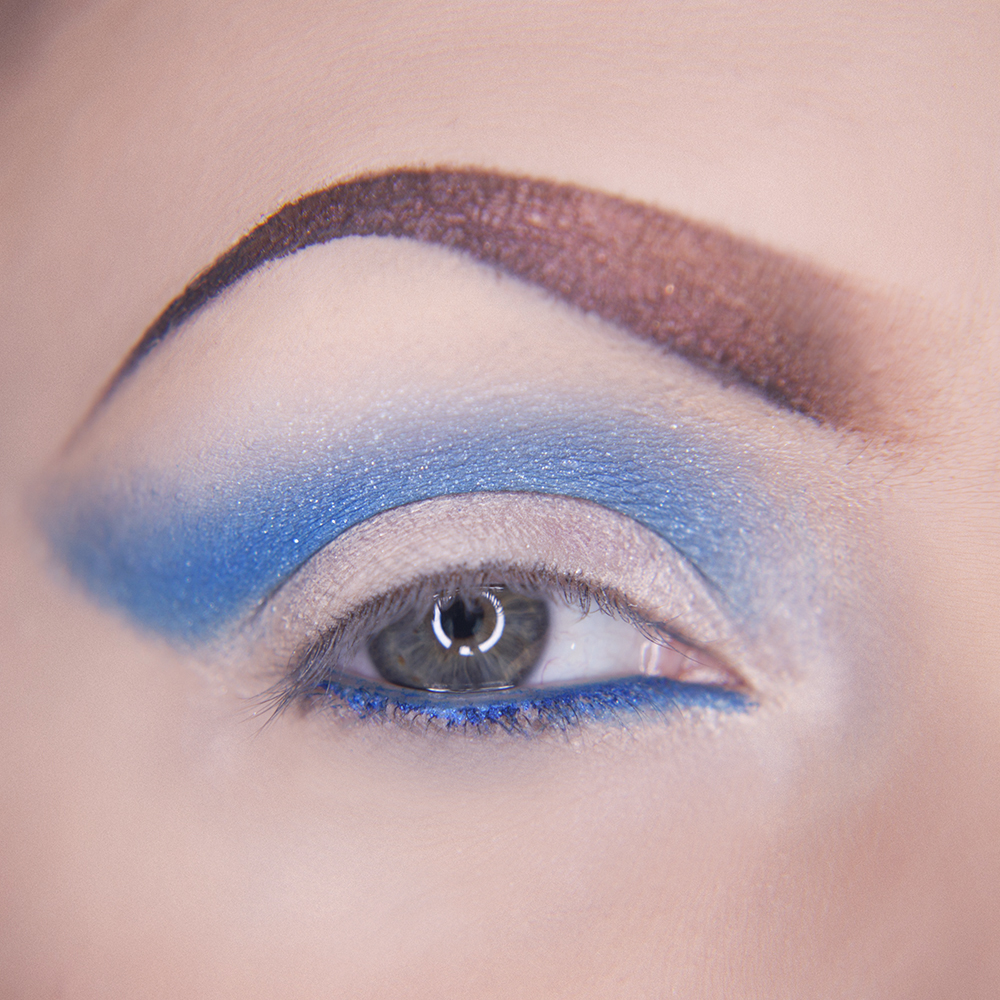
Step 1: Using a flat brush apply the Afterparty pressed eyeshadow along the crease of your eyelid and drag around the outer edge of the eye in a curved shape. Continue the colour along the lashline of your lower lid.
Step 2: Using a medium blending brush blend the colour outwards all around the eye. Use a clean brush to add Lumi loose eyeshadow on your brow bone and blend downwards into the blue.
Step 3: Clean off the brush you used for the previous step and add the Dollipop pressed eyeshadow to your lid and the corner of your eye. Using a thin brush, add just a touch of the pink to the waterline.
Step 4: Using the brush you used for step 1, apply the Magpie loose eyeshadow along your crease, blending out towards the outer edges. Make sure you add less towards the inner eye, and more towards the outer, so you are creating an oval shape.
Step 5: Add a touch of Lumi to the inner corner of your eye, and the centre of your lid.
Step 6: Using liquid or gel eyeliner (I swear by Collection's Liquid Liner), create a cat-flick, starting low on the inner eye and gradually sloping upwards to the outer eye. Add your favourite mascara to the top lash.
Step 7: Add your favourite lashes - I used the Idol eyelashes, I love how the little beads work with the Lumi pigment!
There's 20% off makeup at Playful Promises with code "MAKEMEUP" all weekend (offer ends 3rd Feb), and to celebrate I've put together a new tutorial!
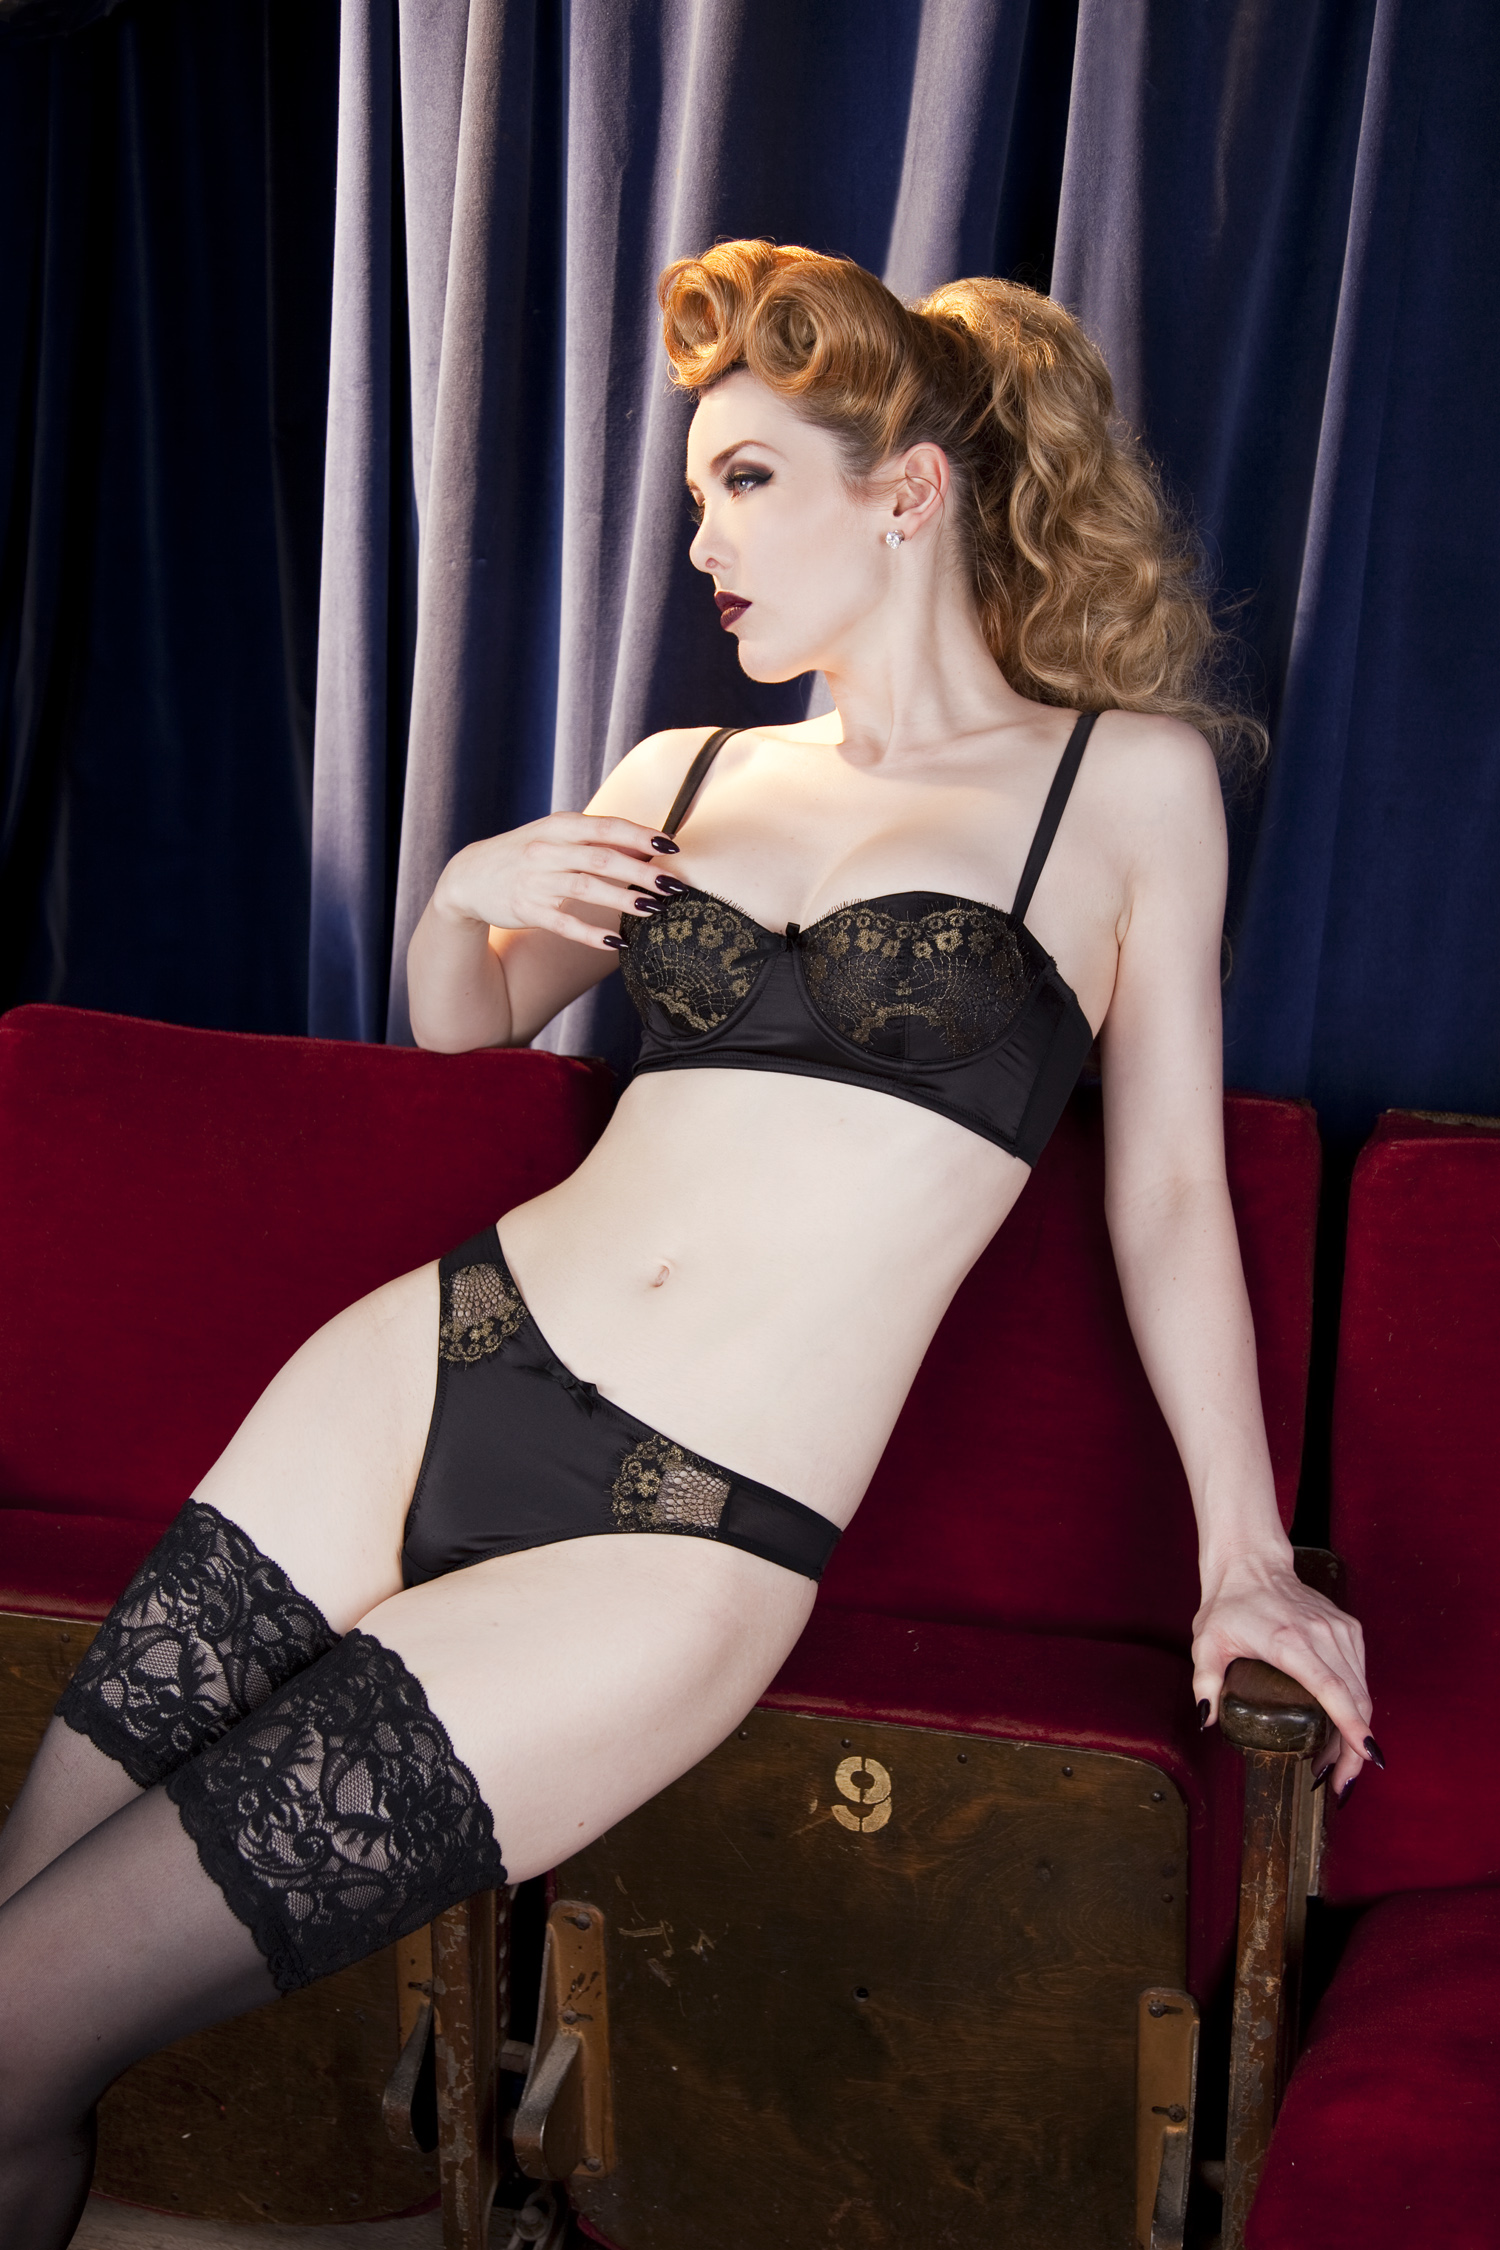
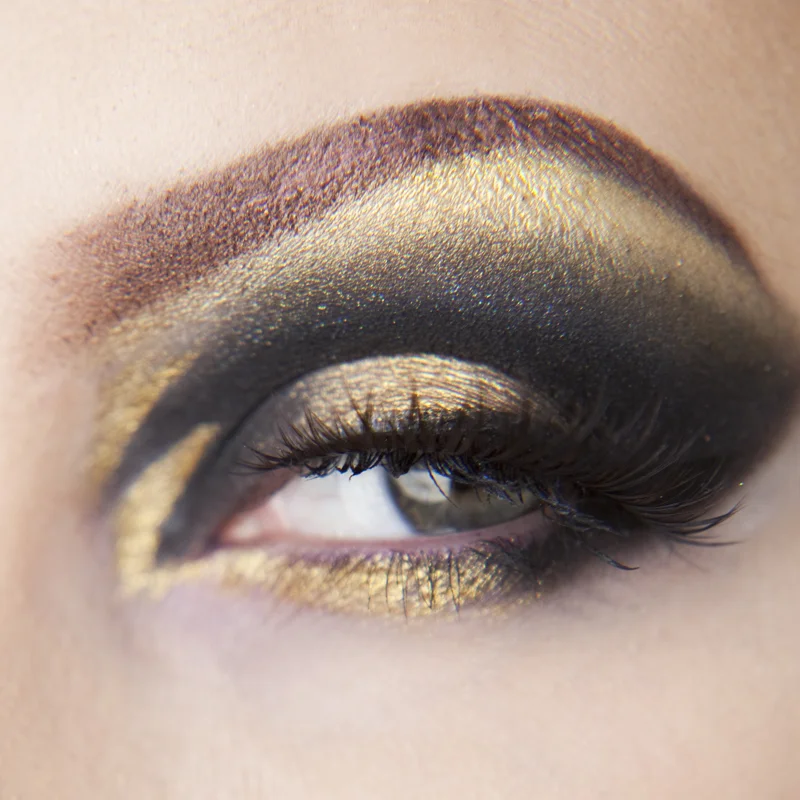
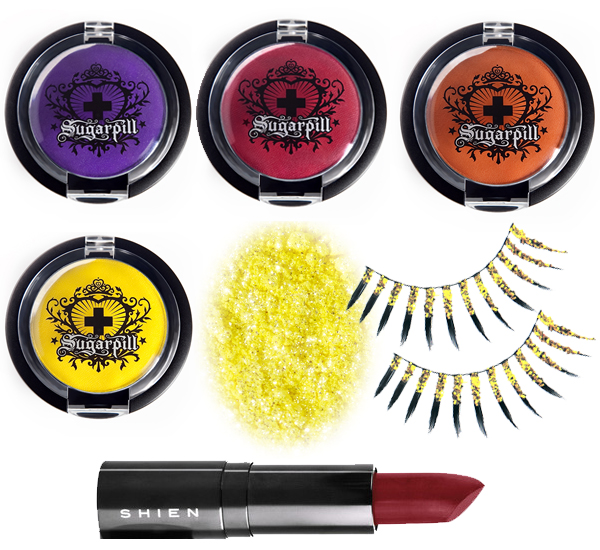
This time I was inspired by our beautiful gold lace Penelope set
For this tutorial I'm using two different types of eyeshadow - loose and pressed. A lot of people prefer pressed eyeshadow as it's less messy and easy to transport, but I find that the pigments and shimmers of the loose powders are just so much more fun! If you drop any on your face while applying, don't worry - just use a cotton bud to wipe the mess away. Some people also prefer to put their foundation on after the eye-makeup, which would cover any mistakes.
I love my makeup bold and bright, but you can lay it on as thick as you like, and be as creative as you like. The great thing about these pigments is that with less product on your brushes, you can create a more subtle look!
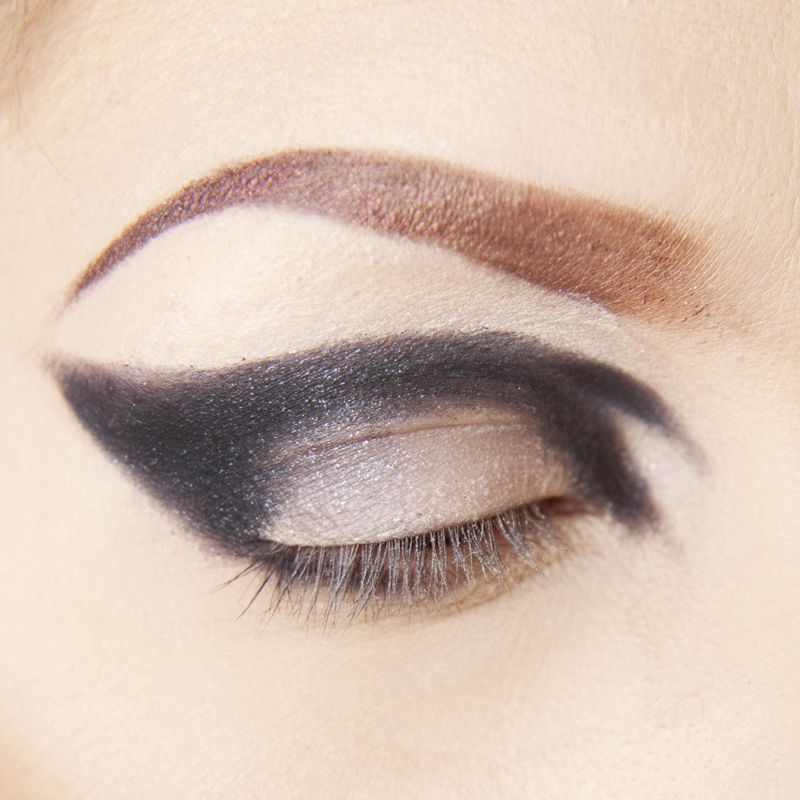
Step 1: Using a thin or flat brush, etch out the basic shape of how you want the black section of the shadow to look. If you are worried, you can first draw a very light line with a kohl pencil before applying any eyeshadow. I used Bulletproof Pressed Eyeshadow to create an exaggerated cat-eye flick on the outer eye, and two points towards the inner eye. I also pulled the colour round to my lower lid, a third of the way along.
Take time on creating the curve of the flick; if you have trouble keeping the line, you can cut a curve out of some paper or card and use this as a template. It's fine if any other section looks a bit messy, as this will be blended out or re-shaped with gold.
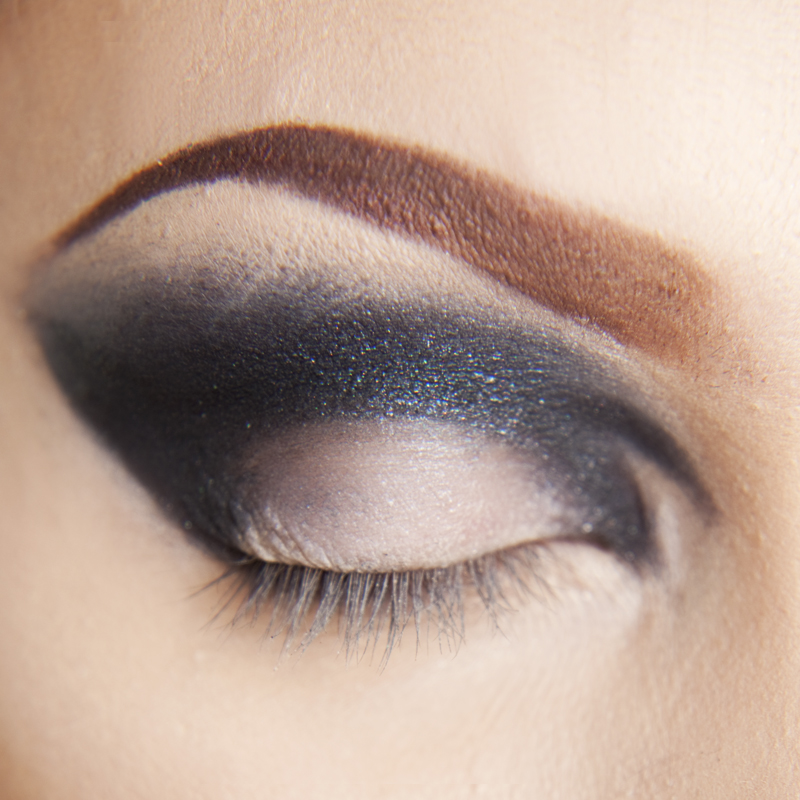
Step 2: Use a medium sized blending brush to apply Stella Loose Eyeshadow to the crease of your eyelid and start blending upwards. The closer to the crease, the more eyeshadow needs to be on the brush - always move your brush from the inside of your eye out towards the flick.
Step 3: Now you can start blending the gold into your look. Using a clean brush, load the Goldilux Loose Eyeshadow onto your brow bone and blend down into the black. I find the easiest way to blend is to gradually sweep the brush across, lower and lower - you may need to add a touch of black onto the brush to make a seamless blend.
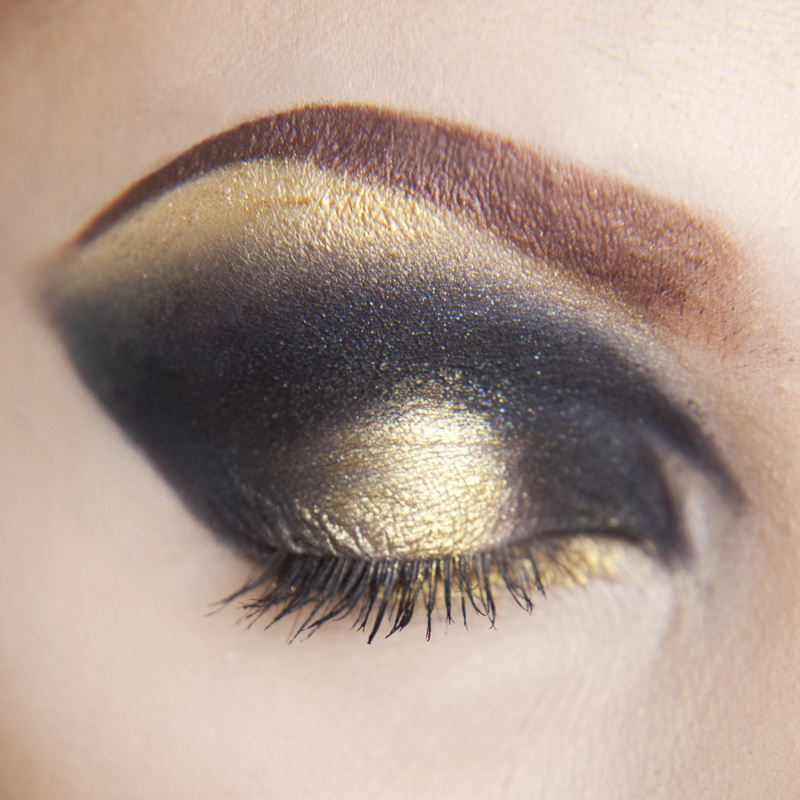
Step 4: For this look I also used a small brush to apply Goldilux along the bottom lid, where it will blend into the black. Add about a cm or so of gold onto the centre of the top lid.
Step 5: Use more Bulletproof to the outside and the inside of the top lid, blending closer to the centre into the gold. Add mascara to the top lash and to the outside corner of the lower lash.
Step 6: Using a very thin brush, neaten up the black point(s) by the inner eye. Don't blend this as you want the black to be a dramatic point-shape here.
Step 7: Use your favourite gel or liquid liner to mimic the cat-flick on the outer eye, but only bring the liner to about halfway along your lid.
Step 8: Add some false eyelashes (I used the Saint lashes as they are the most "natural" for this look). Position so they start about a quarter of the way along your top lid, as close to your lash line as possible.